OpenVPN® client setup for Synology NAS
for VPN Unlimited users
Synology NAS is a network-attached storage device with a variety of functions including backing up computer drive and managing and storing media files.
There are two ways you can cover your Synology NAS with a VPN protection:
- Set up VPN connection on your router and connect Synology NAS to this router. If you choose this way, check out the Routers section of our Manuals page for the relevant guides.
- Configure VPN connection on your Synology NAS. This tutorial provides the step-by-step instruction on how to do it.
Generate and prepare OpenVPN® configuration file
Before setting up VPN on Synology NAS, you need to generate the necessary .ovpn file in your KeepSolid User Office. The tutorial How to manually create VPN configurations provides an easy walkthrough to get the required information.
After you download the .ovpn file, it must be edited. For DSM versions 7.2 and above, the file works as per the manual on the website without having to make any changes with a port change.
For older versions of DSM 6.X, follow these steps to add the port information:
- Open the .ovpn file in a text editor.
- Scroll down to the </key> tag, which is near the end of the document.
- In the configuration file, find the section containing the entry "port 1197" and change it to "port 1194".

Set up VPN on Synology NAS
- Login to your Synology and open the Control Panel.

- Go to Connectivity > Network.

- Navigate to the Network Interface tab and press Create > Create VPN Profile.

- The Create Profile window with a choice of VPN connection methods will appear. Select the option OpenVPN® (via importing a .ovpn file) and press Next.

Download VPN Unlimited
Get VPN Unlimited right now and start enjoying a secure and private internet with absolutely no borders!
- Fill out the fields in the following way:
- Profile name: Create a name for this connection, for example VPN_Unlimited.
- Username: Leave the field blank.
- Password: Leave the field blank.
- Import .ovpn file: Upload the .ovpn file you’ve generated in your User Office.
- CA Certificate: You do not need to upload anything here.
- Once completed, press Next.

- In the Advanced Settings, tick all options and press Next.

- Select the profile you’ve just created and press Connect.

- Wait a few moments till the connection is successfully established. You'll see the profile status change to Connected under the VPN profile.

Turn off IPv6 on your Synology NAS
Before enabling the VPN connection, we recommend you to turn off IPv6 on your Synology NAS. To do this, follow the few simple steps below:
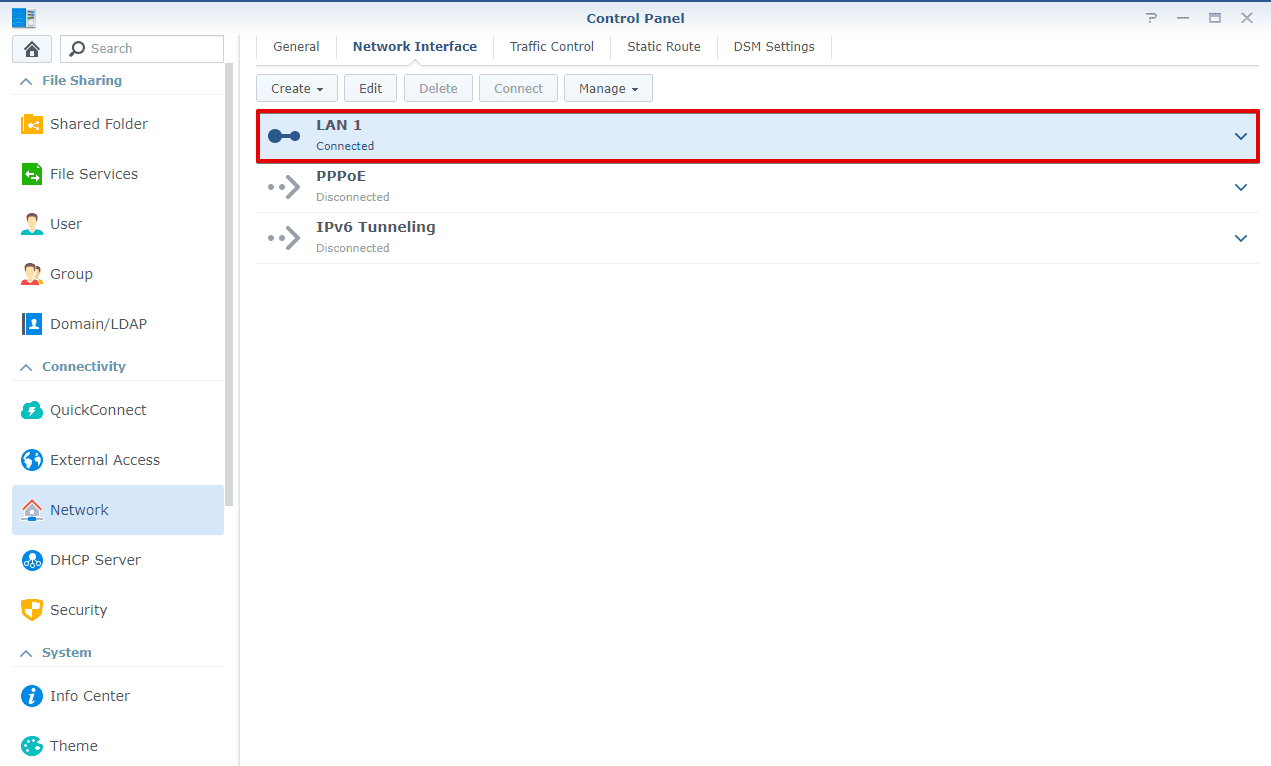
- Navigate to Control Panel > Network > Network Interface.
- Click on the LAN menu to expand it.

- Click Edit.

- Navigate to the IPv6 tab.

- In the IPv6 Setup field, select Off and click OK.


- After you disable IPv6, reboot your Synology.
Want to set up L2TP connection on your Synology device? Follow instructions of our guide on Synology NAS VPN using L2TP protocol.
Need to configure VPN on other devices? Find the relevant guides on the Manuals page or contact our 24/7 customer support via [email protected].
“OpenVPN” is a registered trademark of OpenVPN Inc.
Try VPN Unlimited right now!
Get our best security solution and protect your private data and real-life identity while web surfing. Also, we have a unique VPN Unlimited offer.