How to Use VPN Unlimited on Your macOS Device
Looking for instructions on how to use VPN on Mac? Wondering how to connect to VPN on Mac? You’ve landed in the right place! This tutorial introduces you to a step-by-step guide on how to use the VPN Unlimited app on your macOS device. In this tutorial, our team answers all your questions. How to set up a VPN app on Mac? How to connect to VPN on MacBook? Check it out!
- How to use VPN on Mac: the Main screen of the VPN Unlimited app
- How to use VPN on Mac: the Servers tab
- How to use VPN app for Mac: the Menu screen
Note: DNS Firewall which was previously a built-in security feature of VPN Unlimited, is now available as a separate product. It blocks malware as you surf the web and makes you even more protected online. Learn more on this site.
1. How to Use VPN on Mac: the Main Screen of the VPN Unlimited App
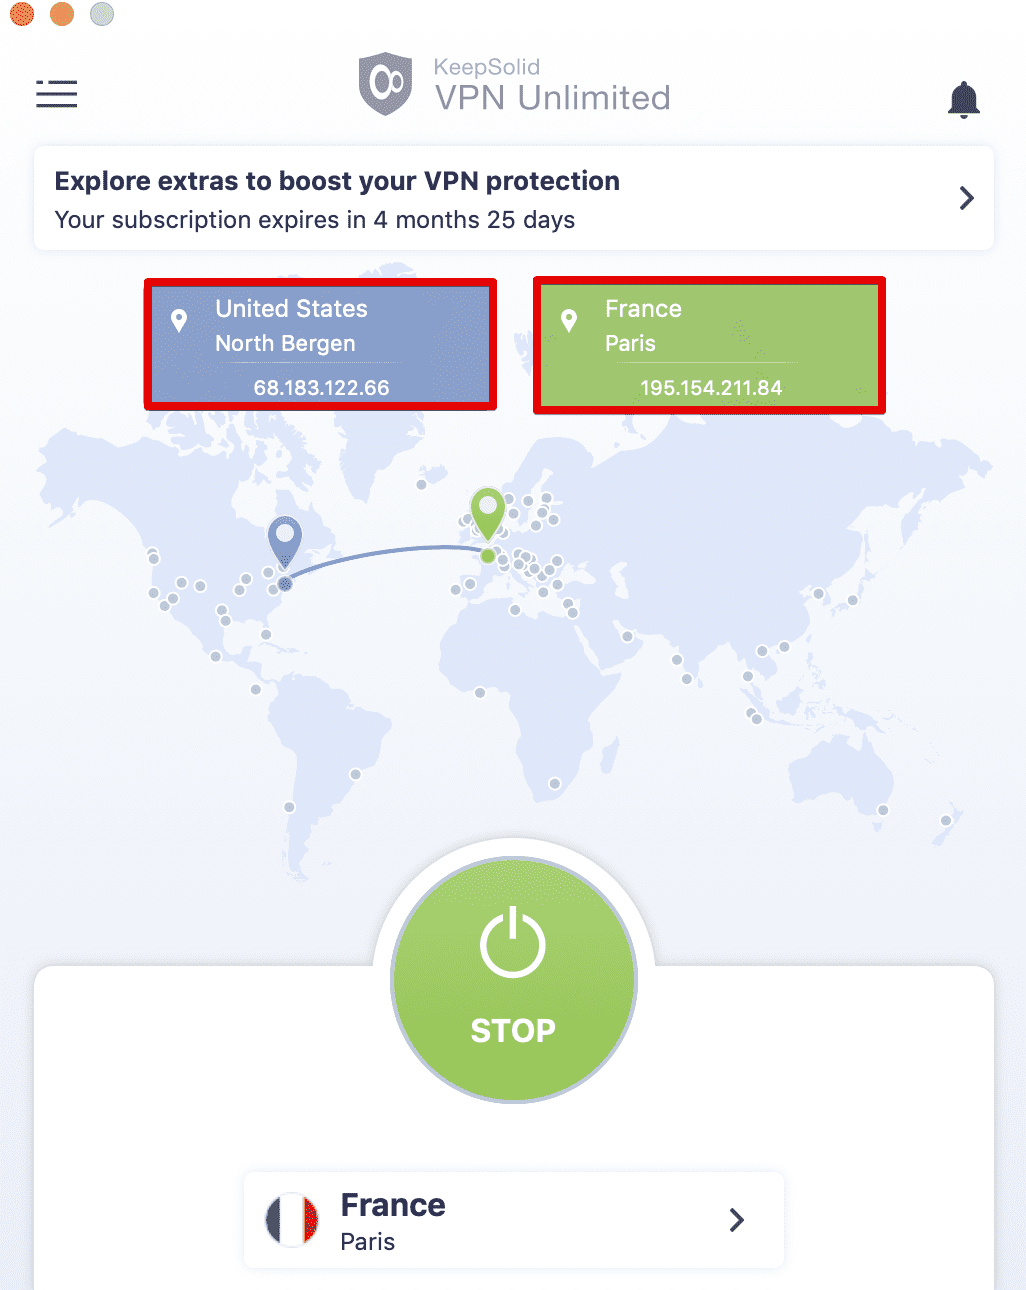
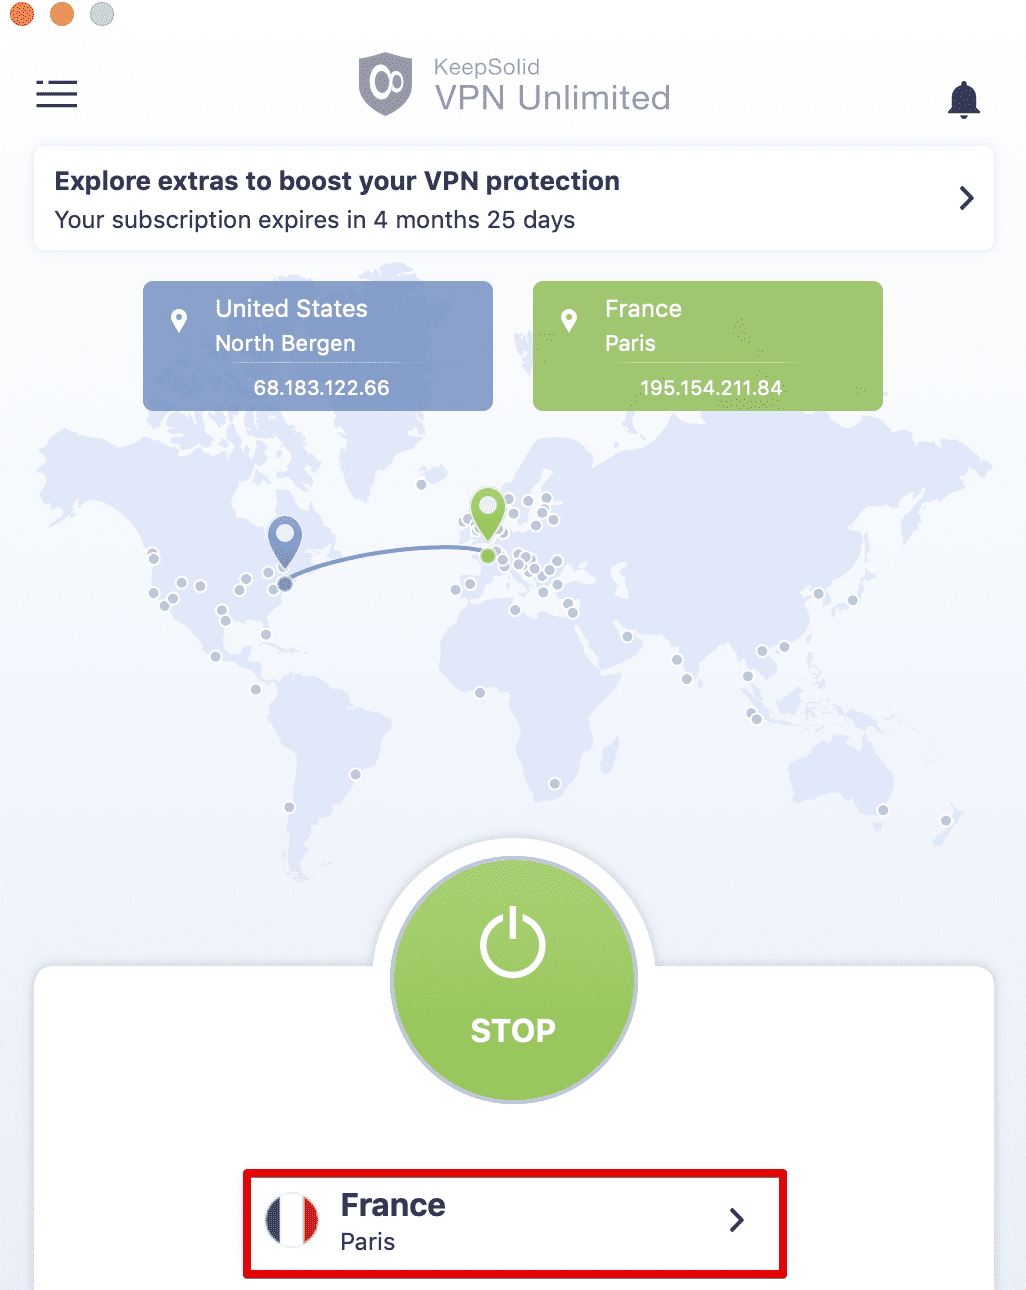
We shall start with the main screen of our VPN app for Mac. Here you can either switch the VPN on or off, just press the Start / Stop button. Also, you can view the map displaying both your real and virtual IP locations.
To view the detailed information about your real and virtual IP addresses on your MacBook, click on the blue and green boxes correspondingly. The information will show up on the Detailed IP info screen and will include the actual IP address, country, and city.

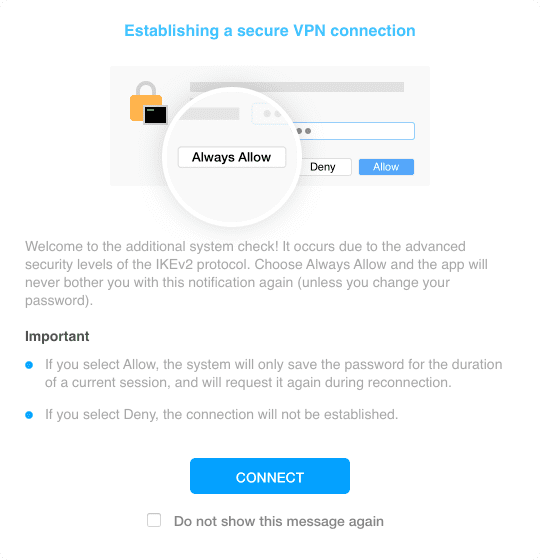
Connecting to a VPN server for the first time, you will be requested to allow adding VPN configurations and downloading a VPN profile. You will see our information screen describing the process. Just click Connect and set the checkbox for Do not show this message again to skip it in the future.
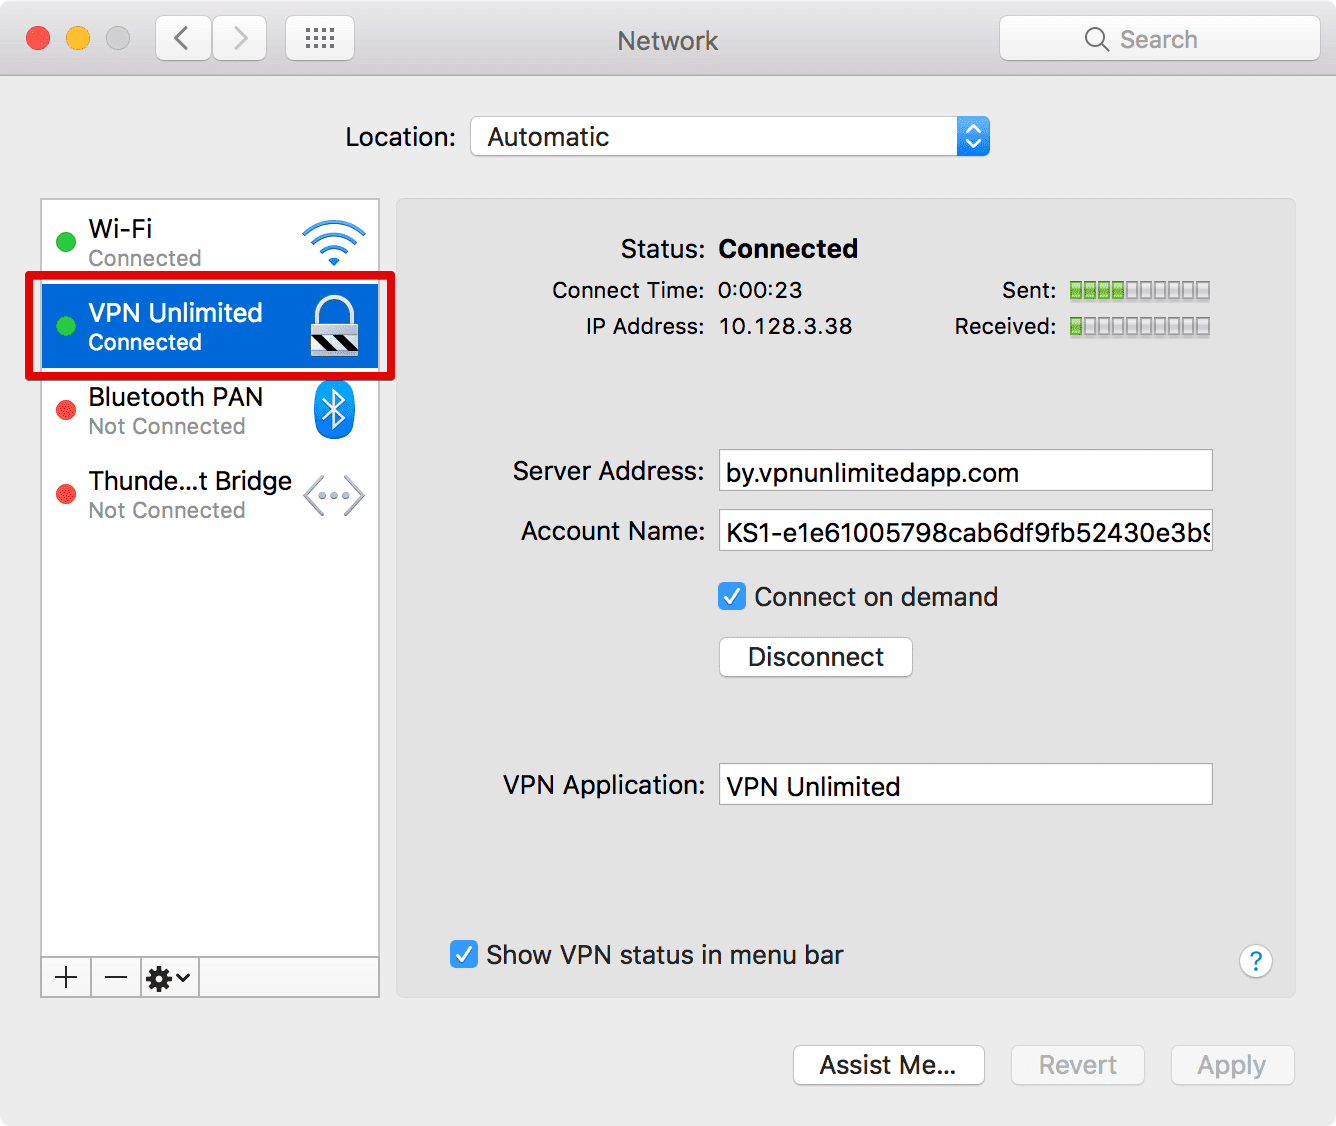
First, to use our VPN for Mac, you need to allow the creation of VPN configurations in your system. Click Allow to proceed.

After that, the VPN Unlimited configuration will be added to the list of network connections on your Mac.
Next, you need to allow access to your KeyChain for neagent or NEIKEv2Provider (the name of the service depends on your Mac version). Enter your macOS account password and select Always Allow, so that this notification will never appear again (unless you change the password or reinstall our VPN app for Mac).


Note: Neagent/NEIKEv2Provider on Mac is a service responsible for establishing secure VPN connections. It requests access to the KeyChain in order to receive authorization data required for the VPN connection to be established.
The

At the bottom you can view the server to which you are connected. To choose another one, press on it and you’ll get to the Servers screen of our VPN for Mac.
2. How to use VPN on Mac: the Servers Screen
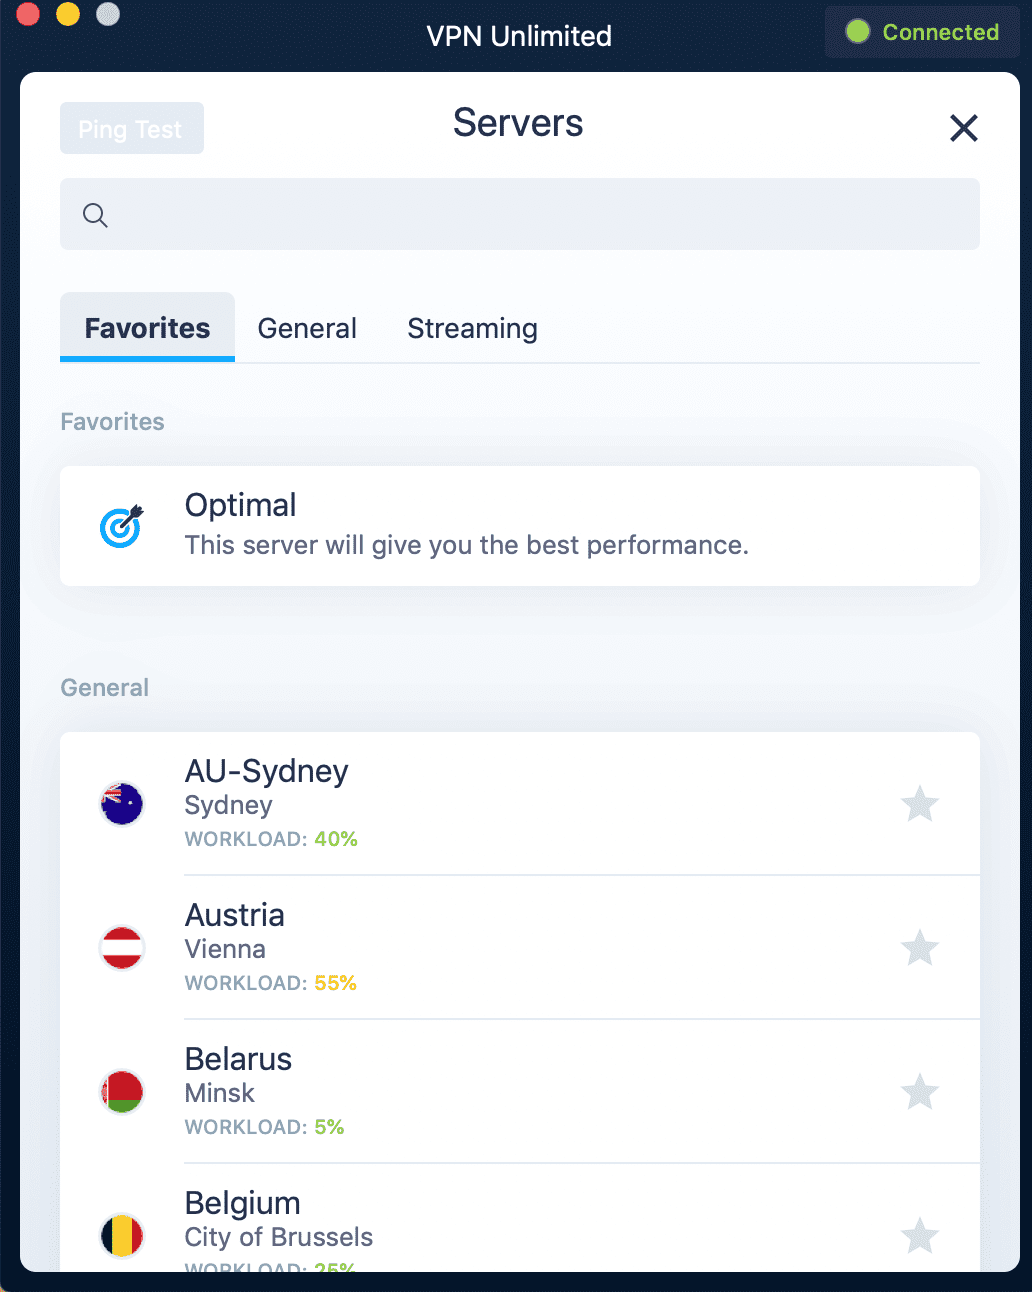
The Servers screen of our VPN app for MacBook consists of 3 tabs:
- Favorites: It is your list of preferred VPN servers for MacBook. To add a server to your Favorites, just click on the star icon next to the desired location name.
Here you can also enable the Optimal server option. It will automatically choose and use a server that should provide the best performance. - General: The tab contains the list of all available VPN locations, except streaming servers.
Under each of the VPN servers, you can see its workload. How to use it? Look for less loaded options that should provide better performance. - Streaming: Here are special servers, which you can use for streaming purposes on your Mac. They include such servers as Hulu, ESPN+, Max, BBC iPlayer, and others.
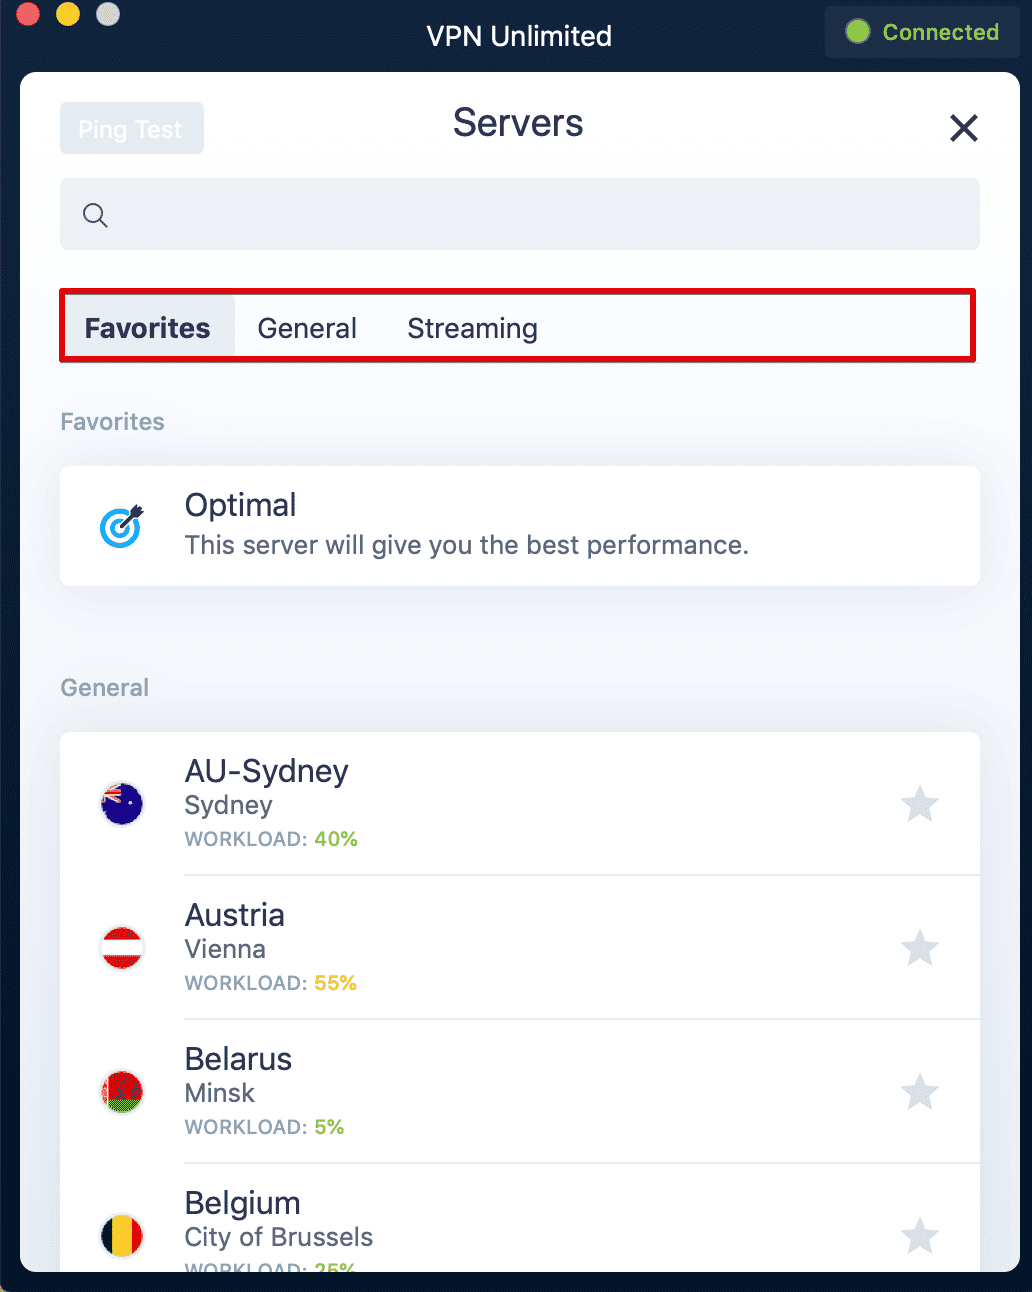
Want to use a specific server? You can find the desired server location either by scrolling down the servers list or by typing the required location in the Search field of our VPN for Mac.
In front of the streaming servers, you can also see

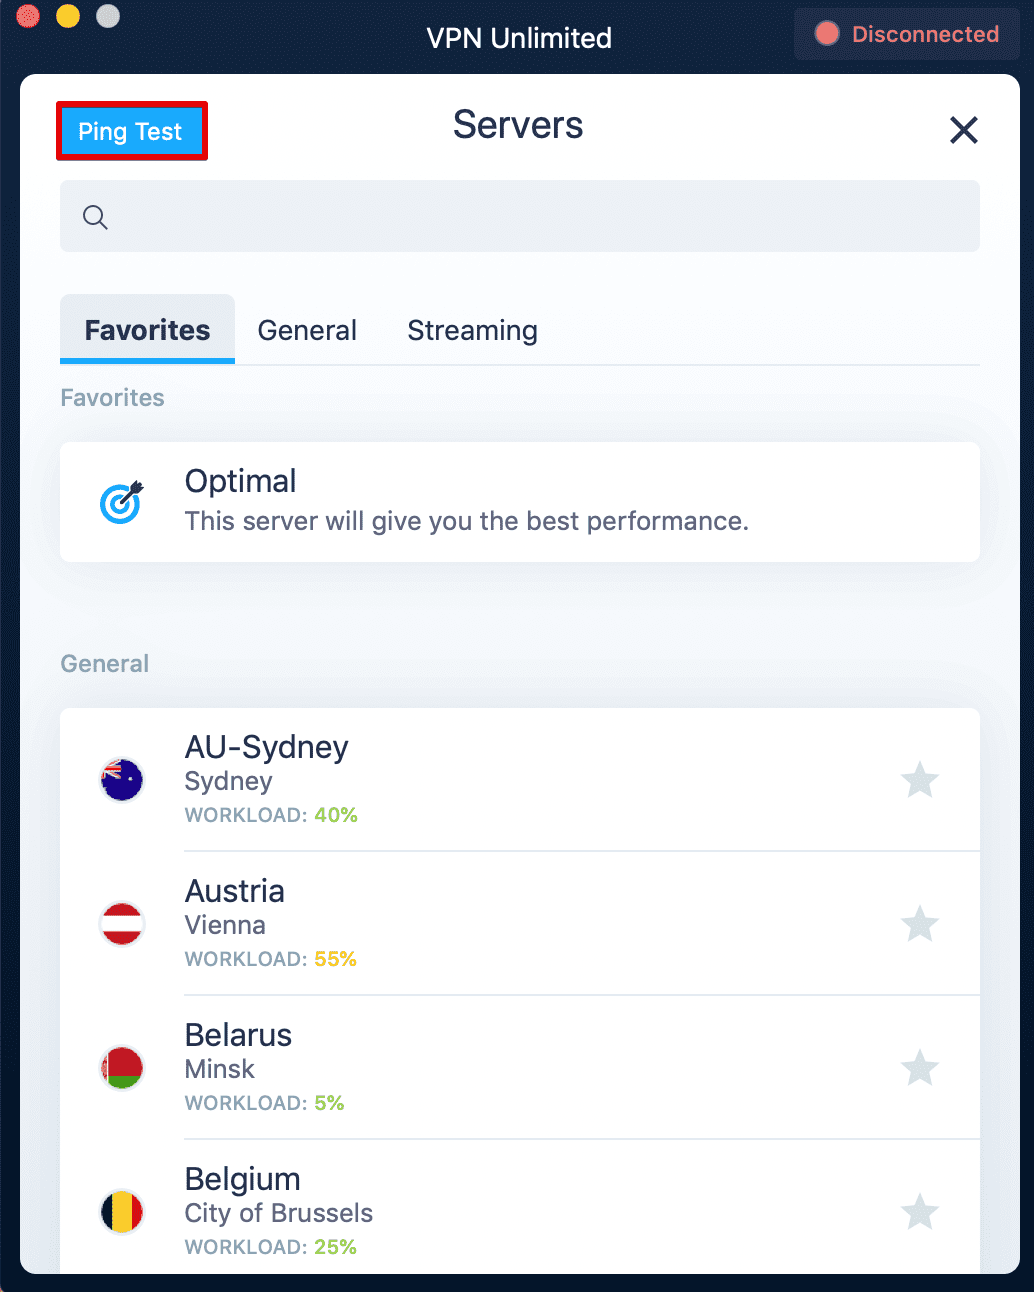
In the top left of the Servers screen of our VPN app for MacBook there is a Ping Test button. The test estimates how long it takes for your device to transmit information to our VPN servers. With the ping test results, you can make a more informed choice of a VPN server. The lower the ping value, the better your connection speed will be.
Note: The ping test cannot be started while the VPN connection is activated, as its results will be misleading. You need to disconnect from a VPN server to run the test.
VPN Unlimited for Mac has servers specially designed for P2P downloading. You can find the list of such torrent-friendly servers below:
- Canada-Ontario
- Romania
- France (Paris)
Use any of them and enjoy safe and anonymous torrents download!
3. How to Use VPN App on Mac: Menu Screen
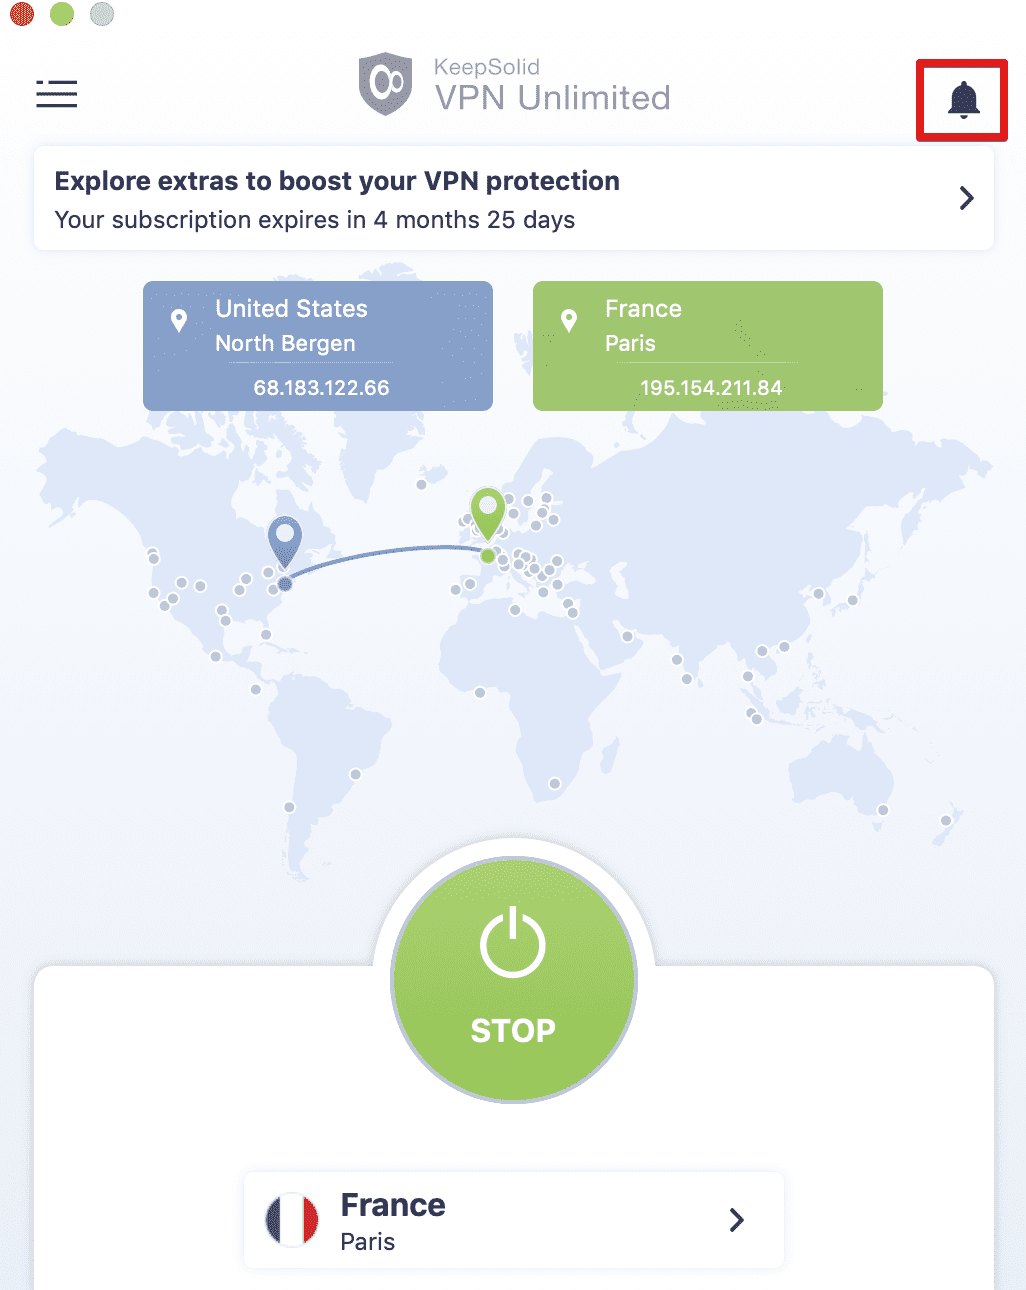
To access the app Menu, press the

The Menu of our VPN app for Mac consists of 4 tabs. The first one is My account where you have the following options:
1) Your KeepSolid ID information: The email address of your account and the remaining period of your subscription.
You can find more information on how to use KeepSolid ID here.
If you want to log out, use the

2) Purchases: Here you can choose the most suitable subscription from the available options. They include VPN subscription plans, as well as Extras:
- Personal VPN server
- Personal IP address
- Additional slots for your devices
- VPN for teams
- Lifetime subscription
Extra services provide an opportunity to bring your online experience to a new level. Check out their benefits here.
You can also use the main screen of our VPN for MacBook to get to the Purchases tab with just one tap. To use the shortcut, tap on the button above the map.

3) Restore Purchase: You have purchased a subscription but cannot see it after the app reinstall or after an upgrade to a new Mac? Use the Restore Purchase button to regain access to the in-app purchase you have made.
4) Change Password: Just enter your current password, then type a new password, confirm it, and tap Change Password.
5) Password Protection: Get an additional layer of security for your identity and enter your password on each launch of the VPN Unlimited app on your Mac.
6) We recommend: Here you can find our top security and productivity solutions, which you can also use on your Mac. Be sure to check them out!

My account is followed by the Settings tab, where you are provided with the following options:
1) Protocols: Either manually choose a protocol to connect to our VPN servers or enable the Optimal option. When the Optimal feature is on, the system automatically picks the most suitable protocol for your current connection conditions.
2) Kill Switch: Turn it on to instantly block internet access in case of a sudden VPN connection drop on your Mac and avoid leaks of any private info.
3) DNS Firewall: This solution performs web filtering and protects you from malware. To activate this solution, enable the toggle button and download the DNS Firewall application on Mac App Store by clicking Get. If you already have this app, click Open to configure DNS settings.
4) Trusted Networks: Use this feature to add WiFi networks that you consider completely secure to be trusted. In your trusted networks VPN connection will be disabled automatically. You can find more information about Trusted Networks here.
5) VPN debug information: When enabled, it records your connection logs, so that we can solve your issue faster. Just enable this option, connect to any VPN server on Mac, click Support (on the Support tab), and your logs will be sent to our technical support team.
Note: This option works with the OpenVPN® and KeepSolid Wise protocols only.
6) Run on Startup: Keep it ON to launch VPN Unlimited at the startup of your Mac.
7) Remove Profile: Remove VPN profile from your Mac. Note that you need an installed profile to run the application.
8) Reinstall Profile: Remove and install your profile over again.

The next, Information tab can be used in the following way:
1) Rate Us: Write a review about our app on the Mac App Store.
2) Leave a feedback: Tell us what you think about the app. We greatly appreciate your comments and suggestions!
3) About VPN Unlimited: Tap on it and see the pop-up message with information about the app version and the link to our website.

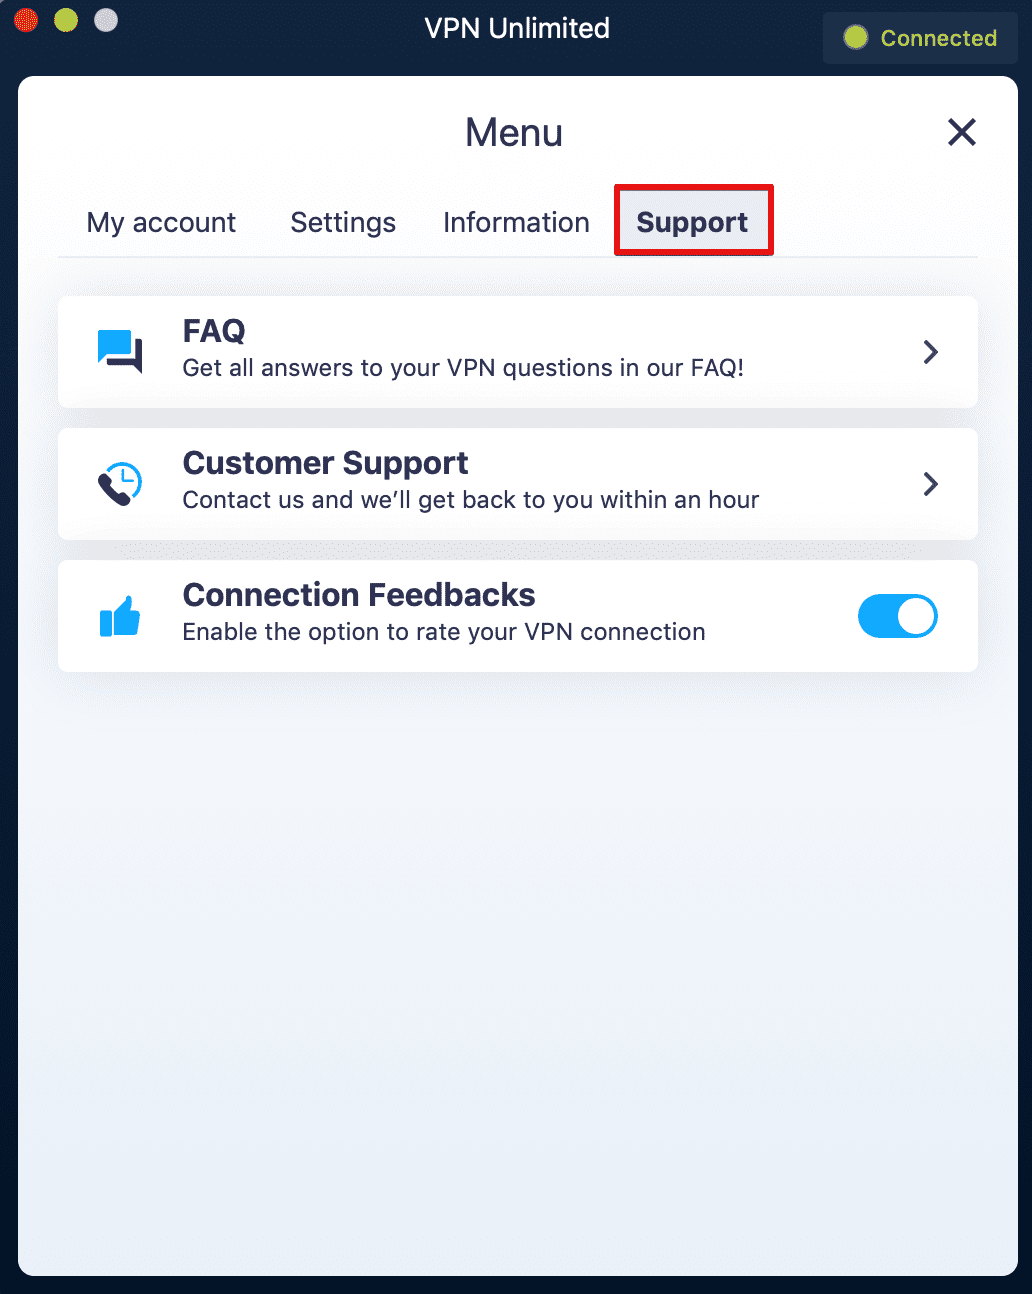
If you need any assistance with our VPN app for Mac or want to manage the connection feedbacks feature, check out the last, Support tab:
1) FAQ: View the answers to the most frequently asked questions.
2) Customer Support: Need help or have suggestions? Complete a support ticket and we will respond as soon as possible.
3) Connection Feedbacks: When this option is enabled, we’ll ask you to rate the quality of the VPN connection on your Mac each time you disconnect from a server. This will help us make the app even better for you.
Bottom Line on Using VPN Unlimited on Mac
That’s it for today! We hope that our manual about how to use VPN on Mac was helpful for you. Have any additional questions, comments, or suggestions regarding our service? Please contact our customer support team at [email protected].
Get Started with VPN Unlimited on macOS Now
Protect your data and identity while banking, shopping, or simply surfing online!
Check out our Lifetime Subscription Plan.