What is User Office and what is it for?
User Office is your personal control center where you can manage your subscriptions for KeepSolid products in a variety of ways.
In this manual, we will answer the most frequent questions about the User Office on the example of the VPN Unlimited service. Most of the covered cases are also applicable to other KeepSolid products. For easy navigation, check out the table of contents below.
Note: VPN Unlimited is available as a part of the MonoDefense security bundle.
- How to manage my devices?
- How to manage entry points?
- How to change my password?
- How to change the location of my Personal Server or Personal IP?
- How to prolong my Personal Server or Personal IP?
- How to cancel automatic renewal of my subscription?
- How to redeem a code?
- How to unsubscribe from the newsletter?
- How to export my data?
- How to delete my personal data and my account?
- How to enable two-factor authentication?
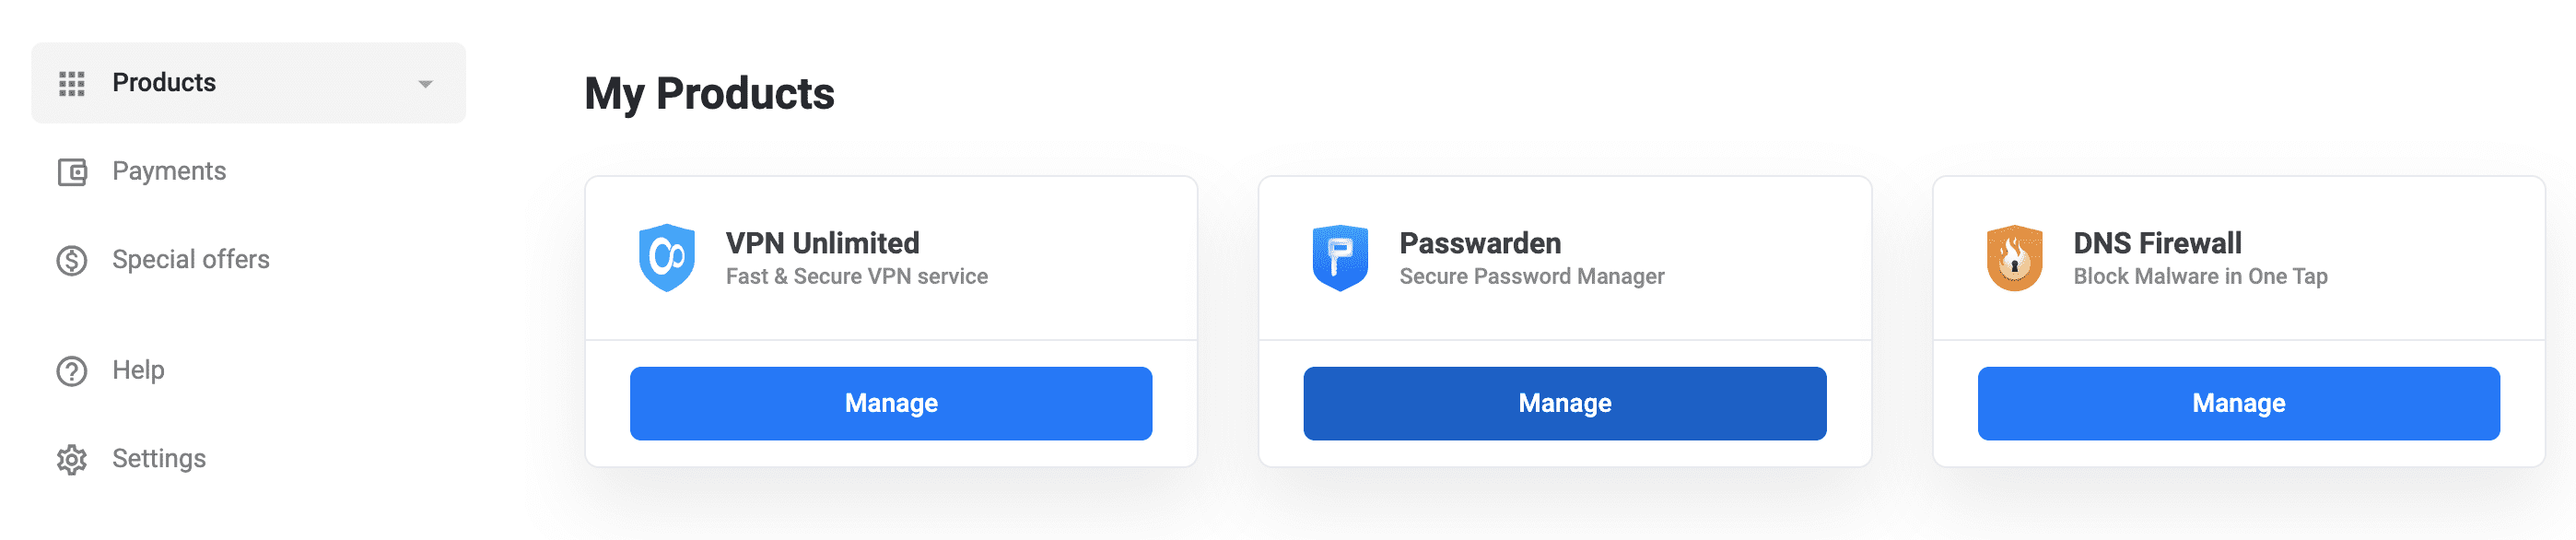
First of all, you need to go to my.keepsolid.com, login with your KeepSolid ID, Facebook, Google account, Apple ID, or Sign-In Code, and click Manage for the appropriate product to start.
Wondering what is KeepSolid ID and how can you find it? Check out this page to learn more.
How to manage my devices?
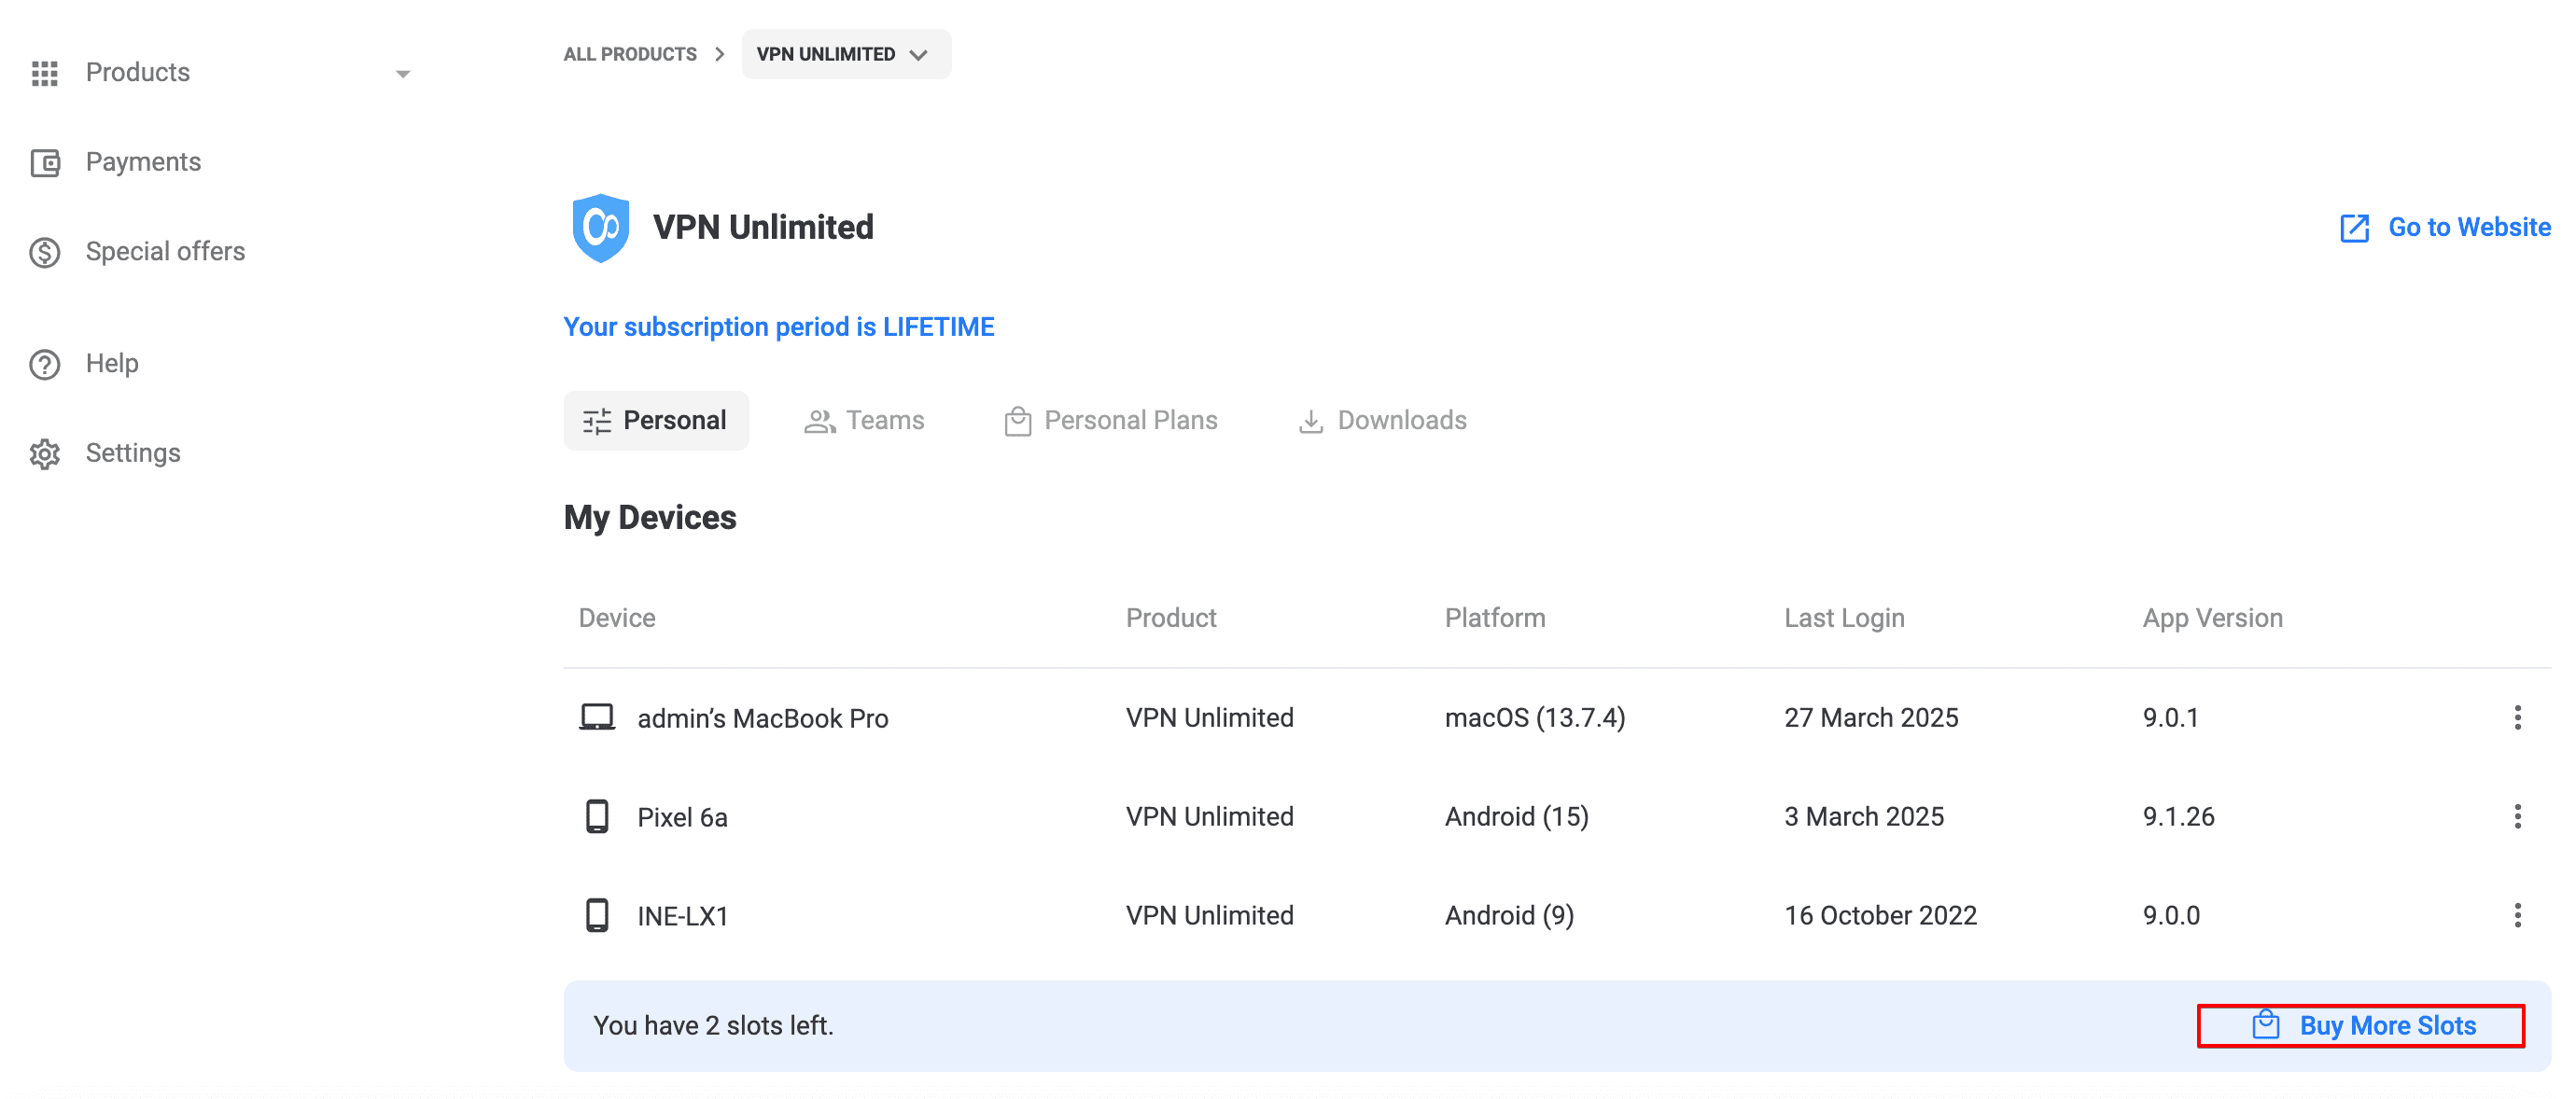
According to VPN Unlimited ADDENDUM to the End User Agreement, the service allows to use up to 5 different devices (including various users within one operating system and different web browsers in case of using a VPN Unlimited extension) for each particular account. A device is recorded in the database at the moment you use it to sign in to the VPN Unlimited app. The device stays there until it is manually removed.
Note: Devices may duplicate themselves after software, hardware, and OS updates.
If you are out of slots but want to add a new device, first you need to delete one of the already registered devices. After that, you need to log out and log back into the VPN Unlimited app on the new device you wish to activate.
To remove an unused device, log in to your User Office, press Manage for VPN Unlimited, and navigate to the My Devices section. There you can view the list of all your devices in use and manage them manually.
Note: You may remove the first 5 devices without restrictions monthly. After that, you will be limited to removing 1 device per day for a month from the date of the removal of the first device.
You can always extend the number of devices for your account by pressing Buy More Slots.
How to manage entry points?
If you used your Apple ID or Facebook/Google account to sign in to the VPN Unlimited app and now want to use the email/password method instead, please follow the next steps:
- Log in to the User Office.
- Click Settings in the sidebar on the left.
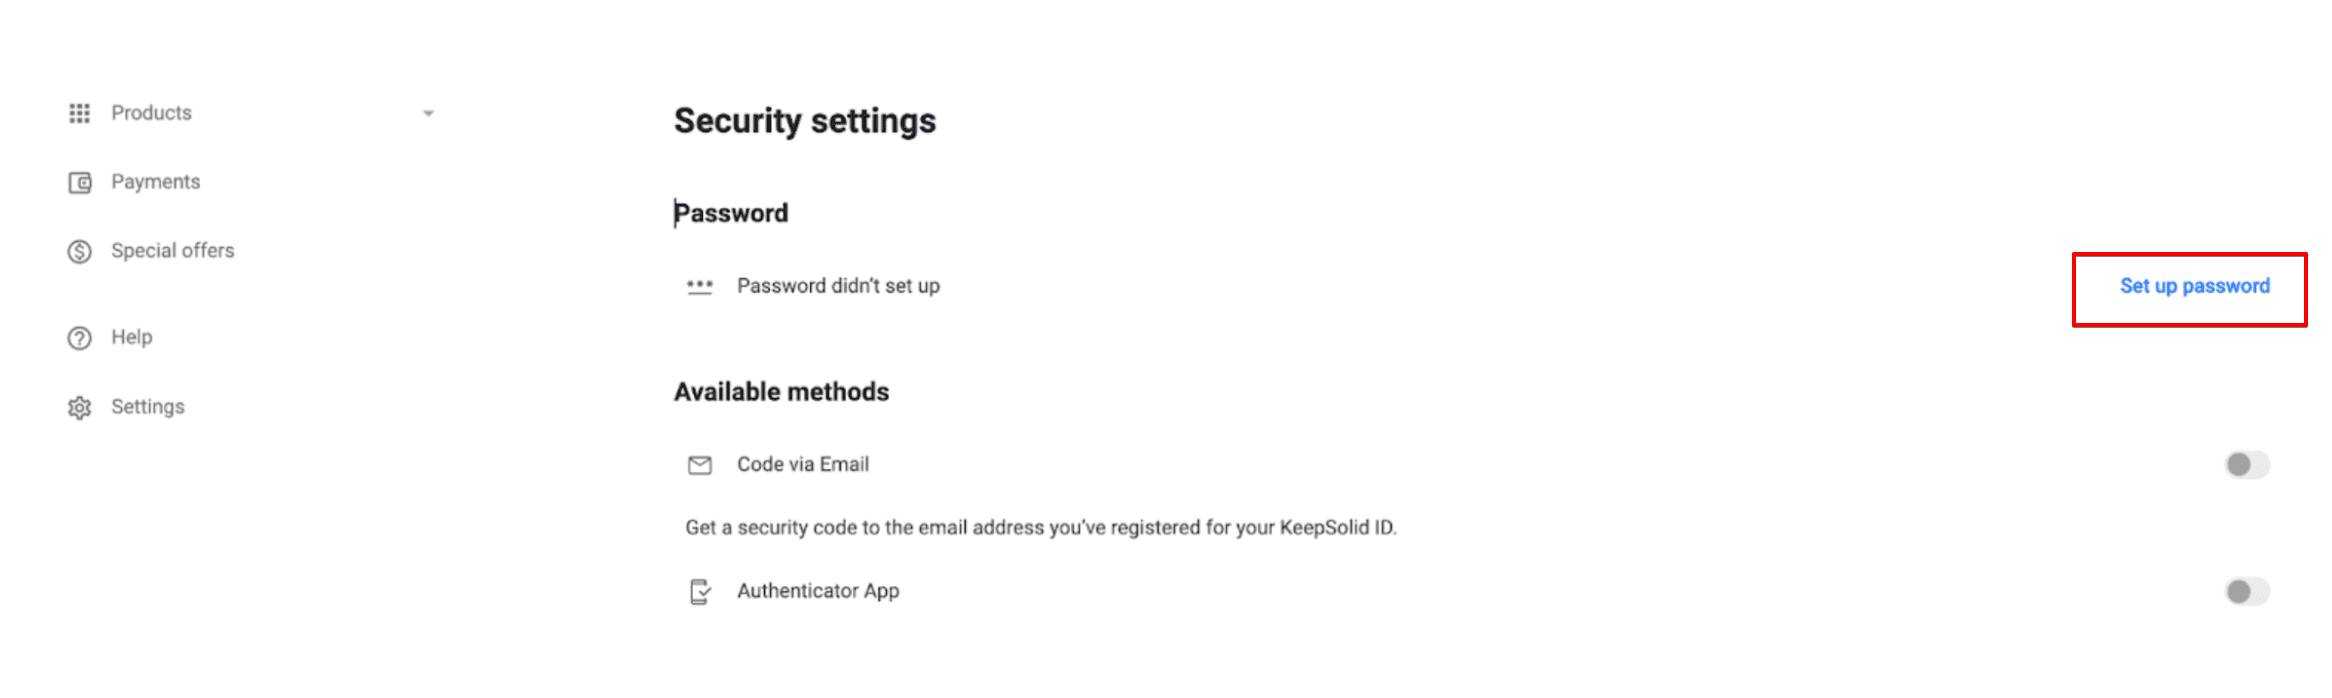
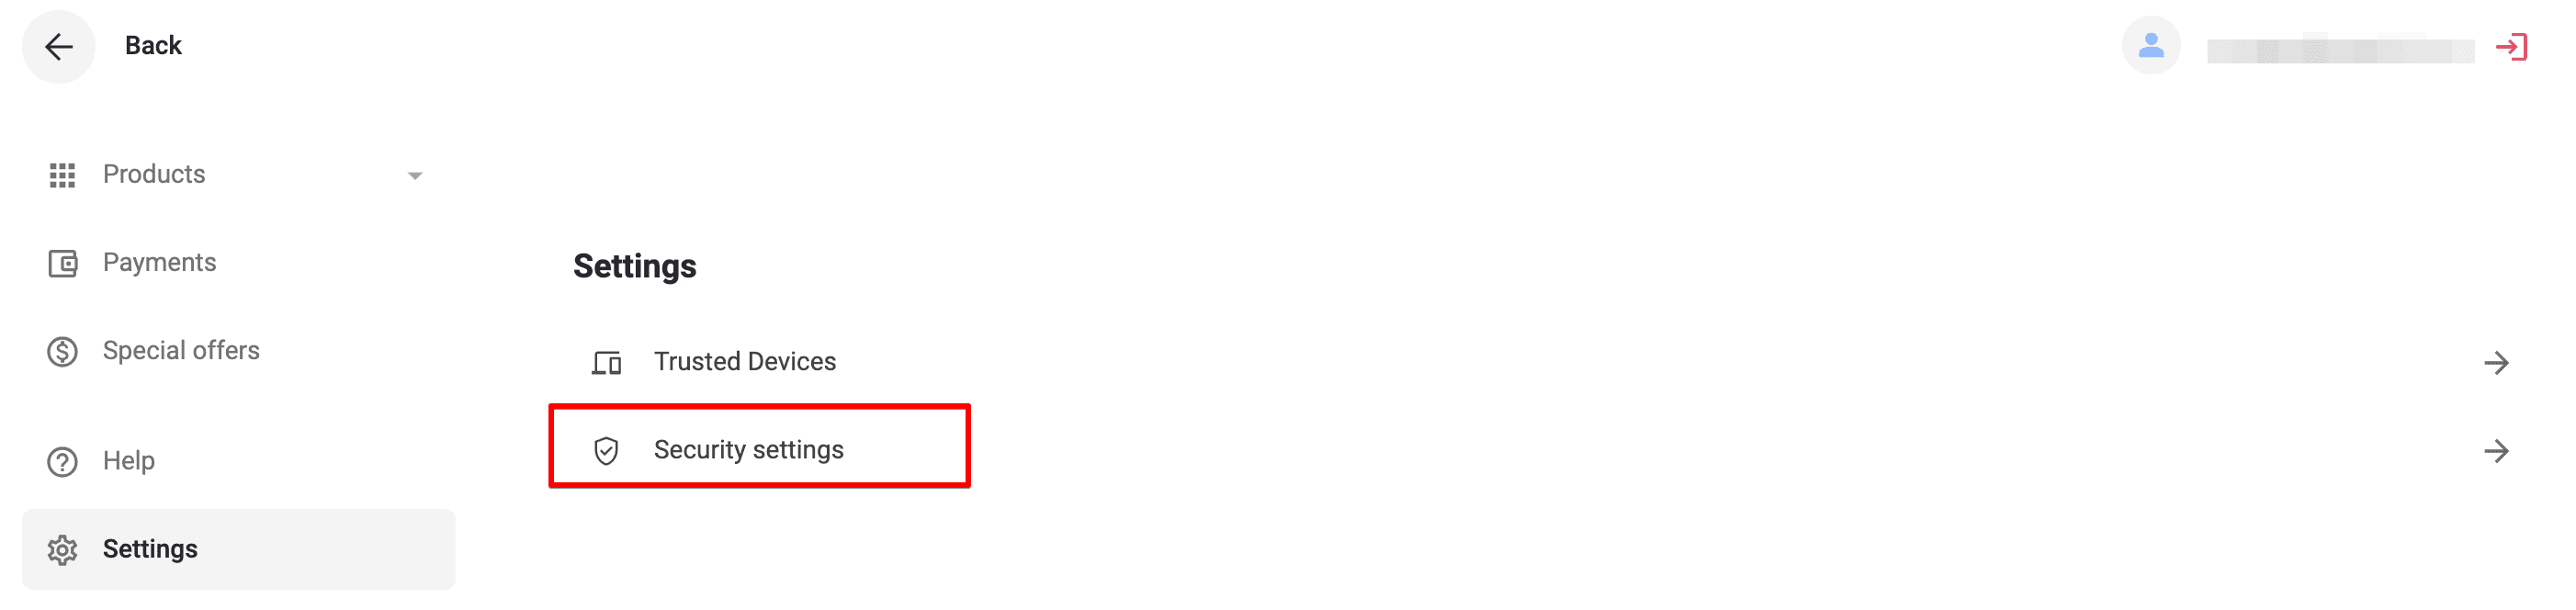
- Click Security settings in the Settings section - Password - Set Up Password.
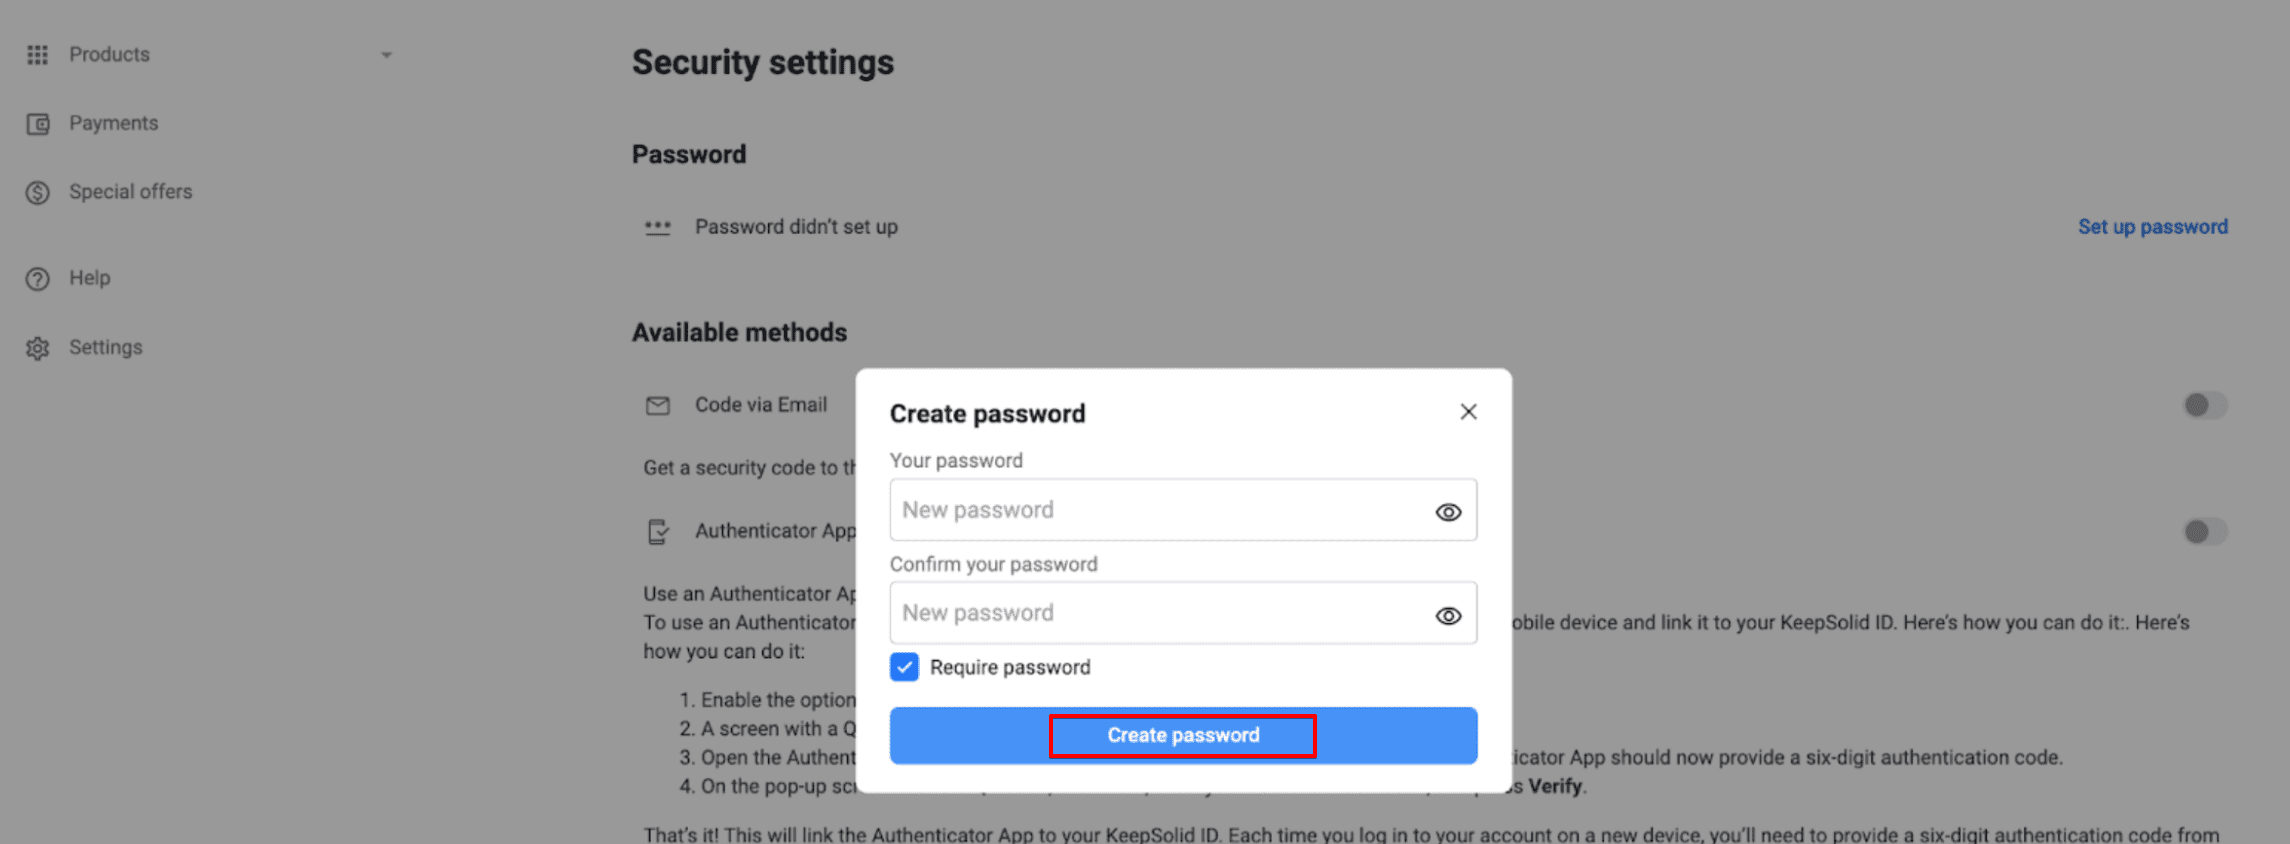
- In the Create Password dialog, enter the password twice to set it up.
- Click Create Password to save.
This way, you will be able to log in using your email and password.
If you used your email to sign in to the VPN Unlimited app and now want to use a Google account instead, please follow the next steps:
- Log in to the User Office with your email and password.
- Click Settings in the sidebar on the left.
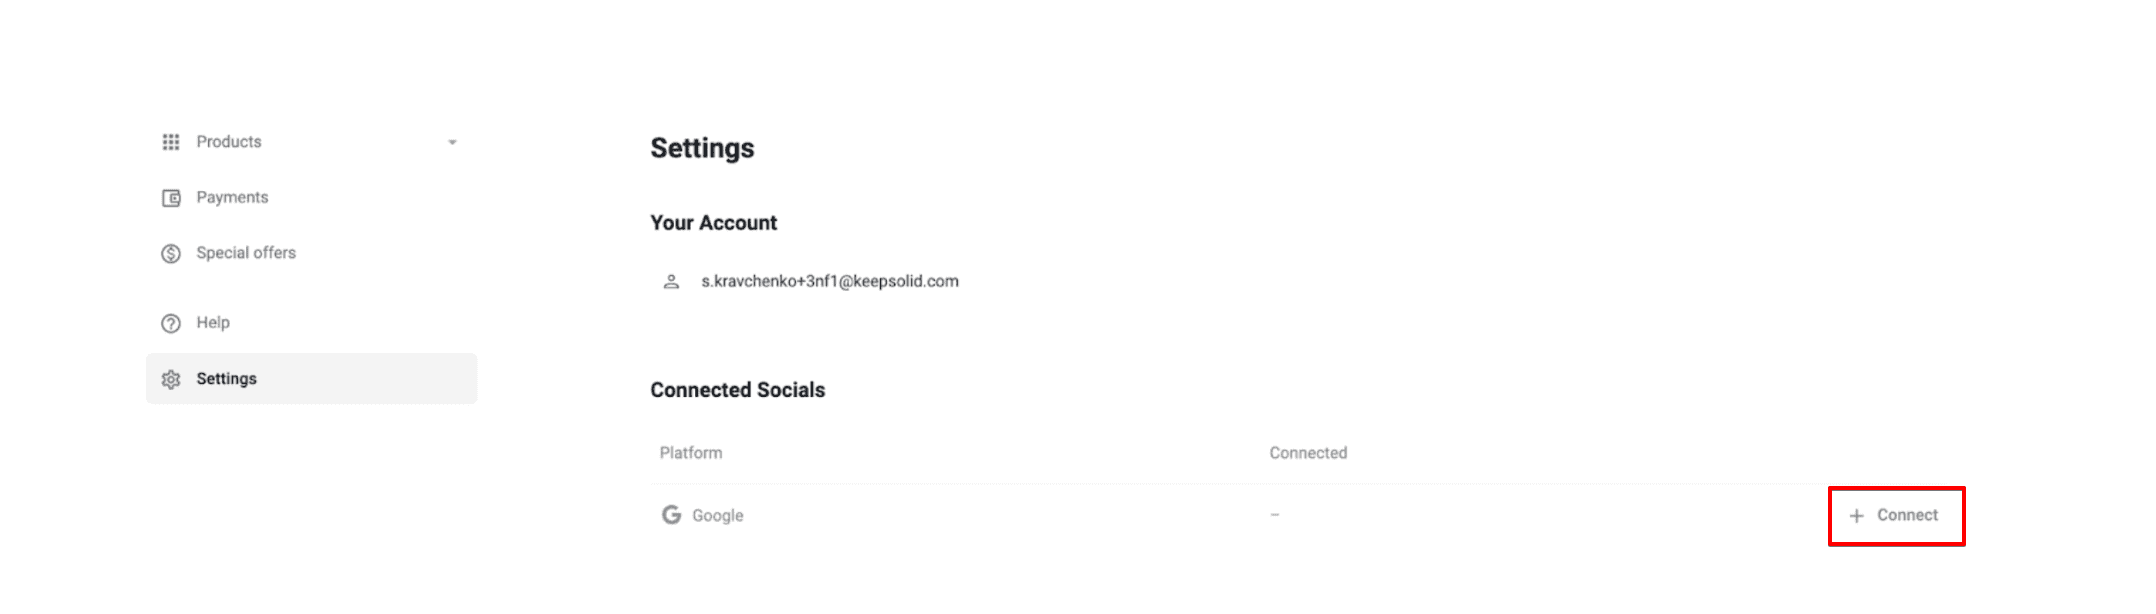
- Find the Connected Socials section and click the + Connect button to add a new entry point.
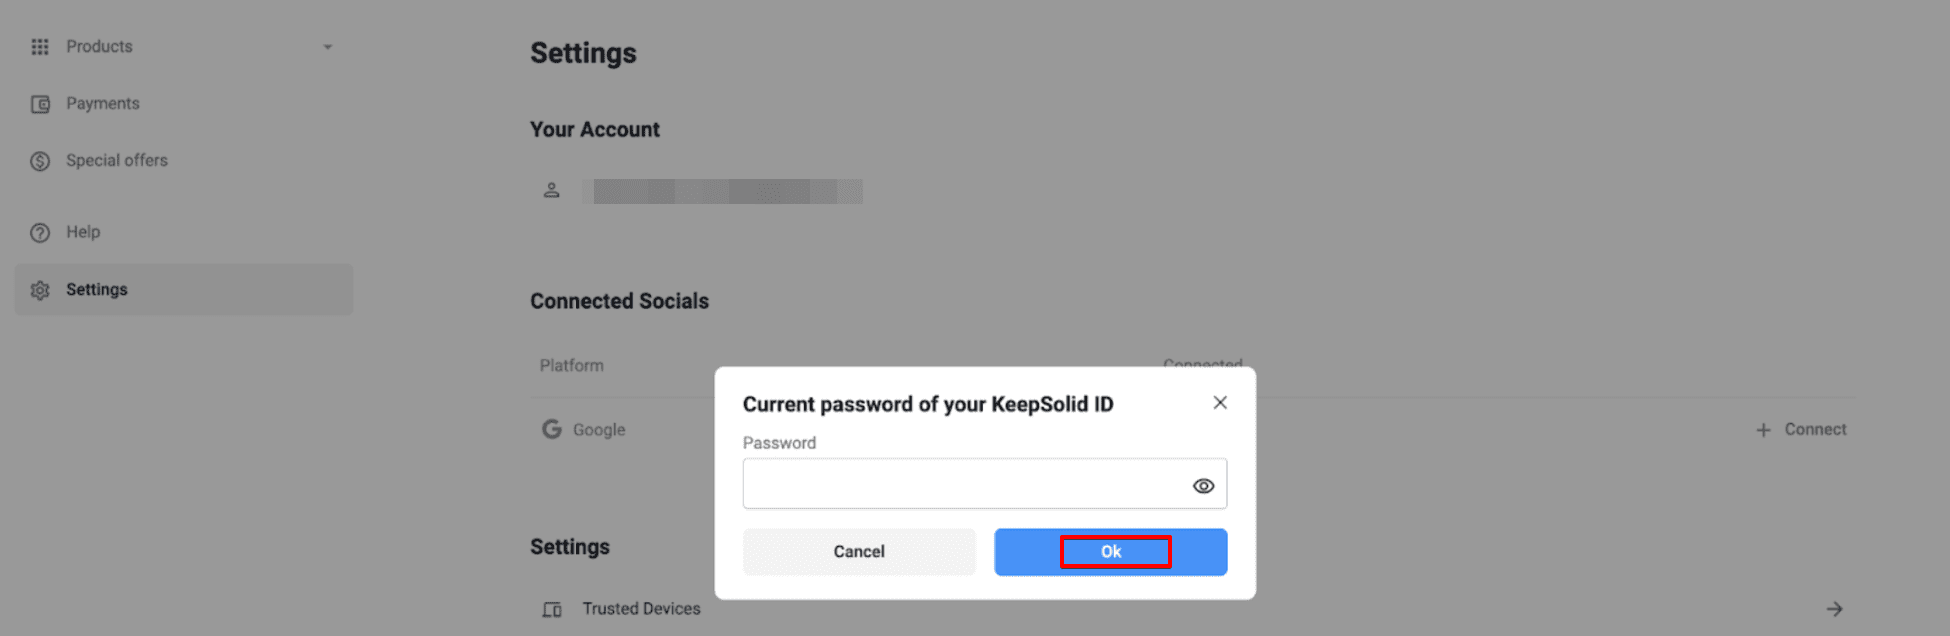
4. Navigate to the Google option and press Connect opposite it.
5. A pop-up window will appear, asking you to enter the current password of your KeepSolid ID.
6. Enter your KeepSolid ID password in the field and click OK to confirm.
Great! Your social network is successfully linked to your account, and you can now log in using Facebook or Google.
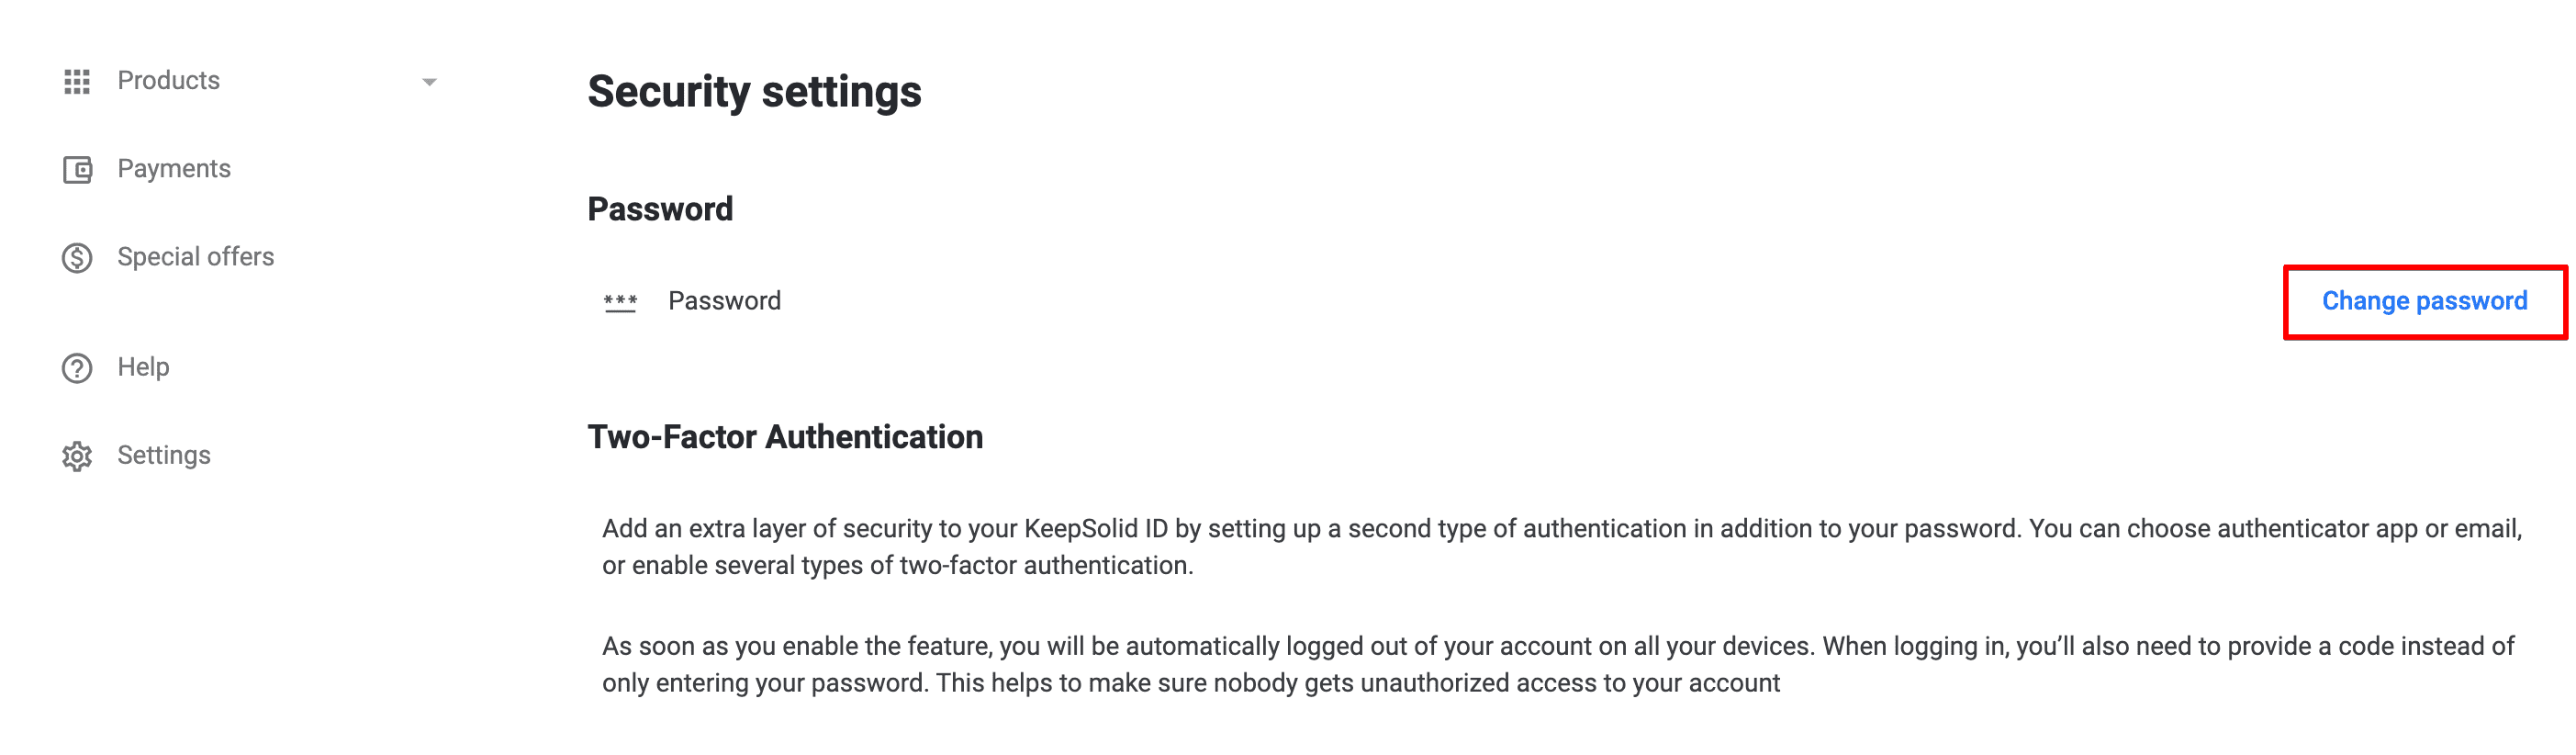
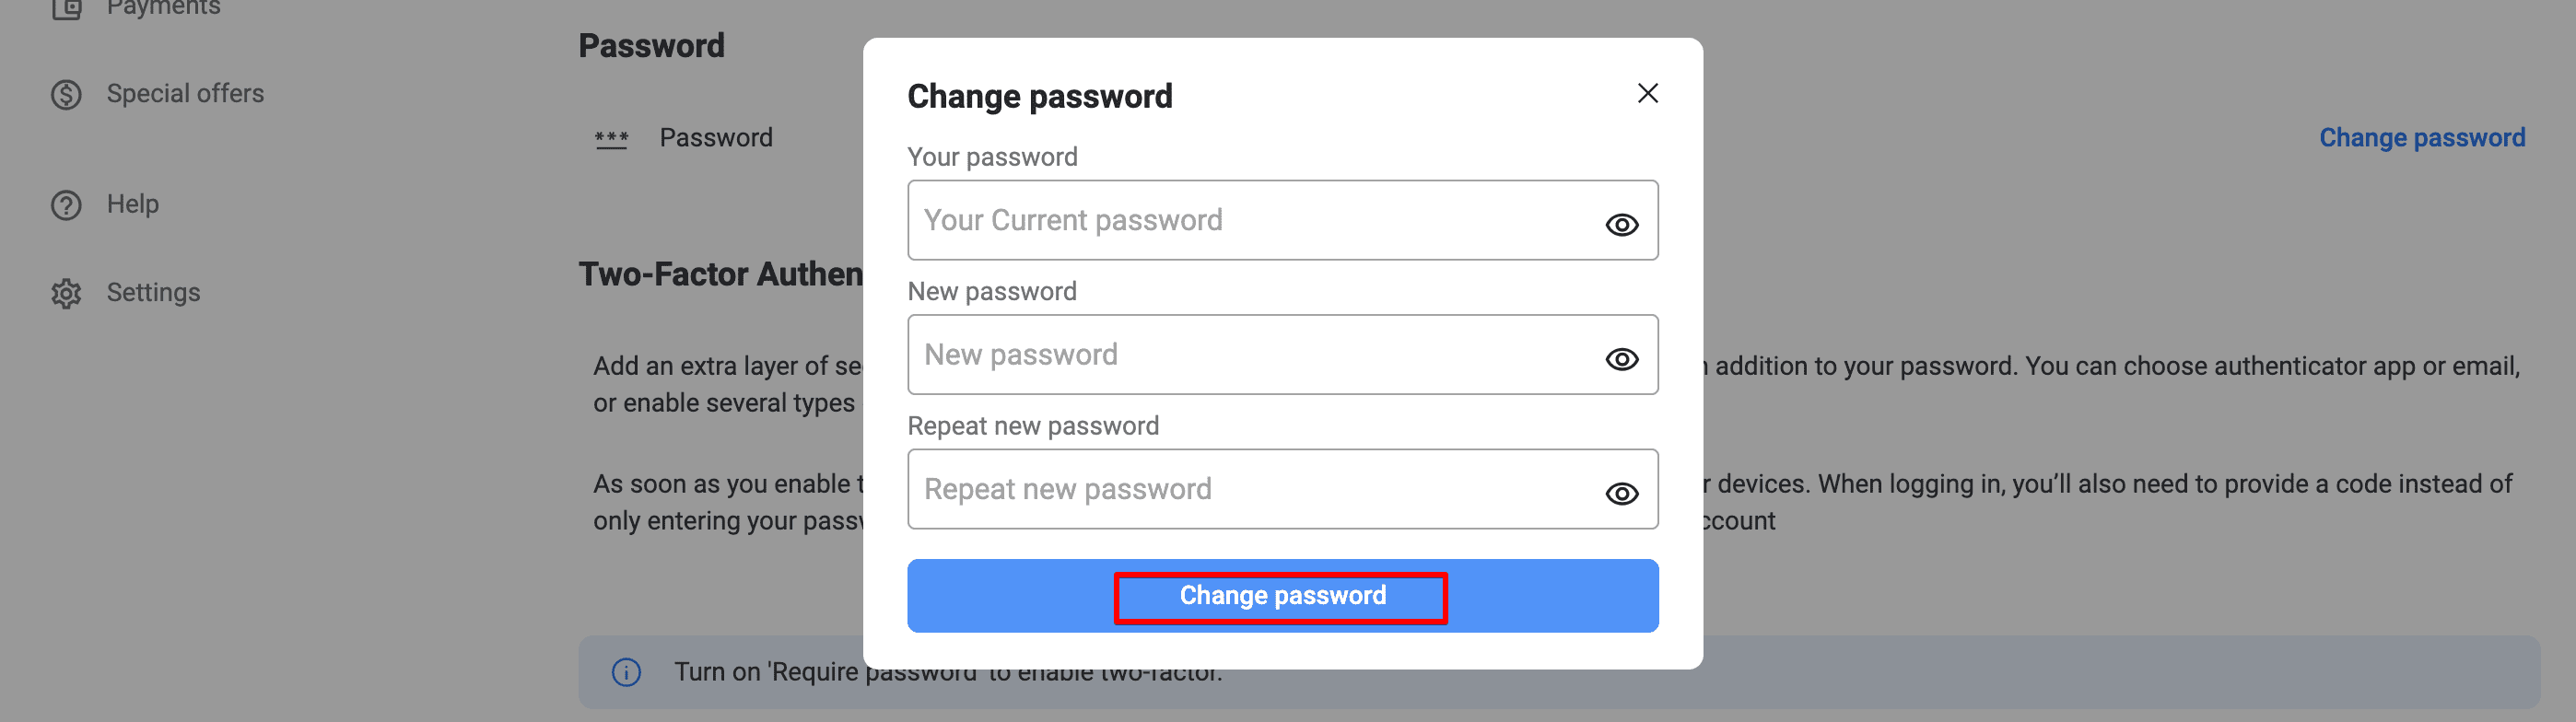
3. Navigate to the Security settings section and find the Password option.
4. Click Change password.
5. Enter your current password, then input your new password and confirm it by repeating the new password.
6. When you finish, click Change password to save the changes.
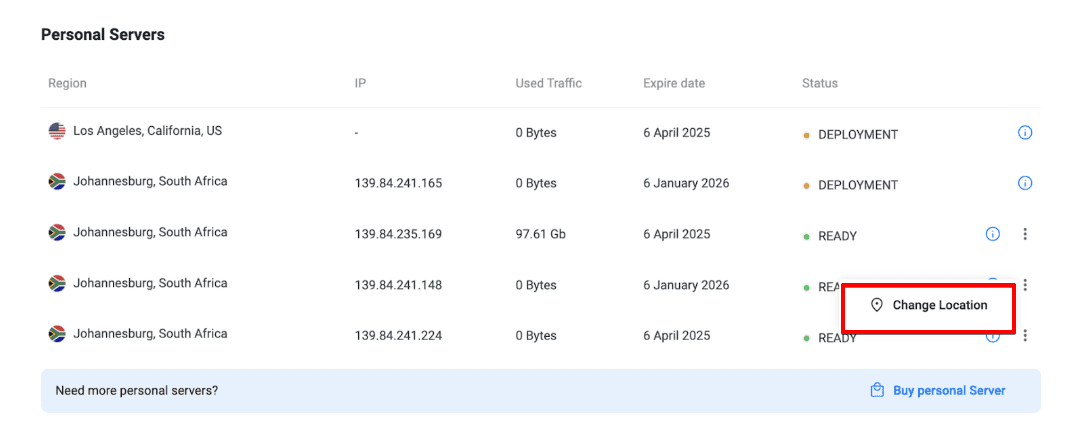
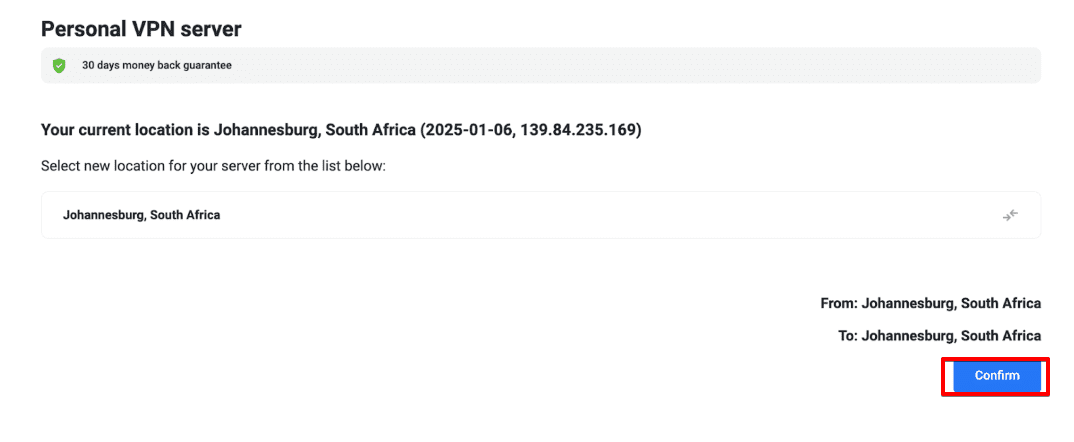
How to change the location of my Personal Server or Personal IP?
- Log in to your User Office.
- Find the VPN Unlimited product, and click Manage.
- Press the Change Location button next to the appropriate Personal Server or Personal IP.
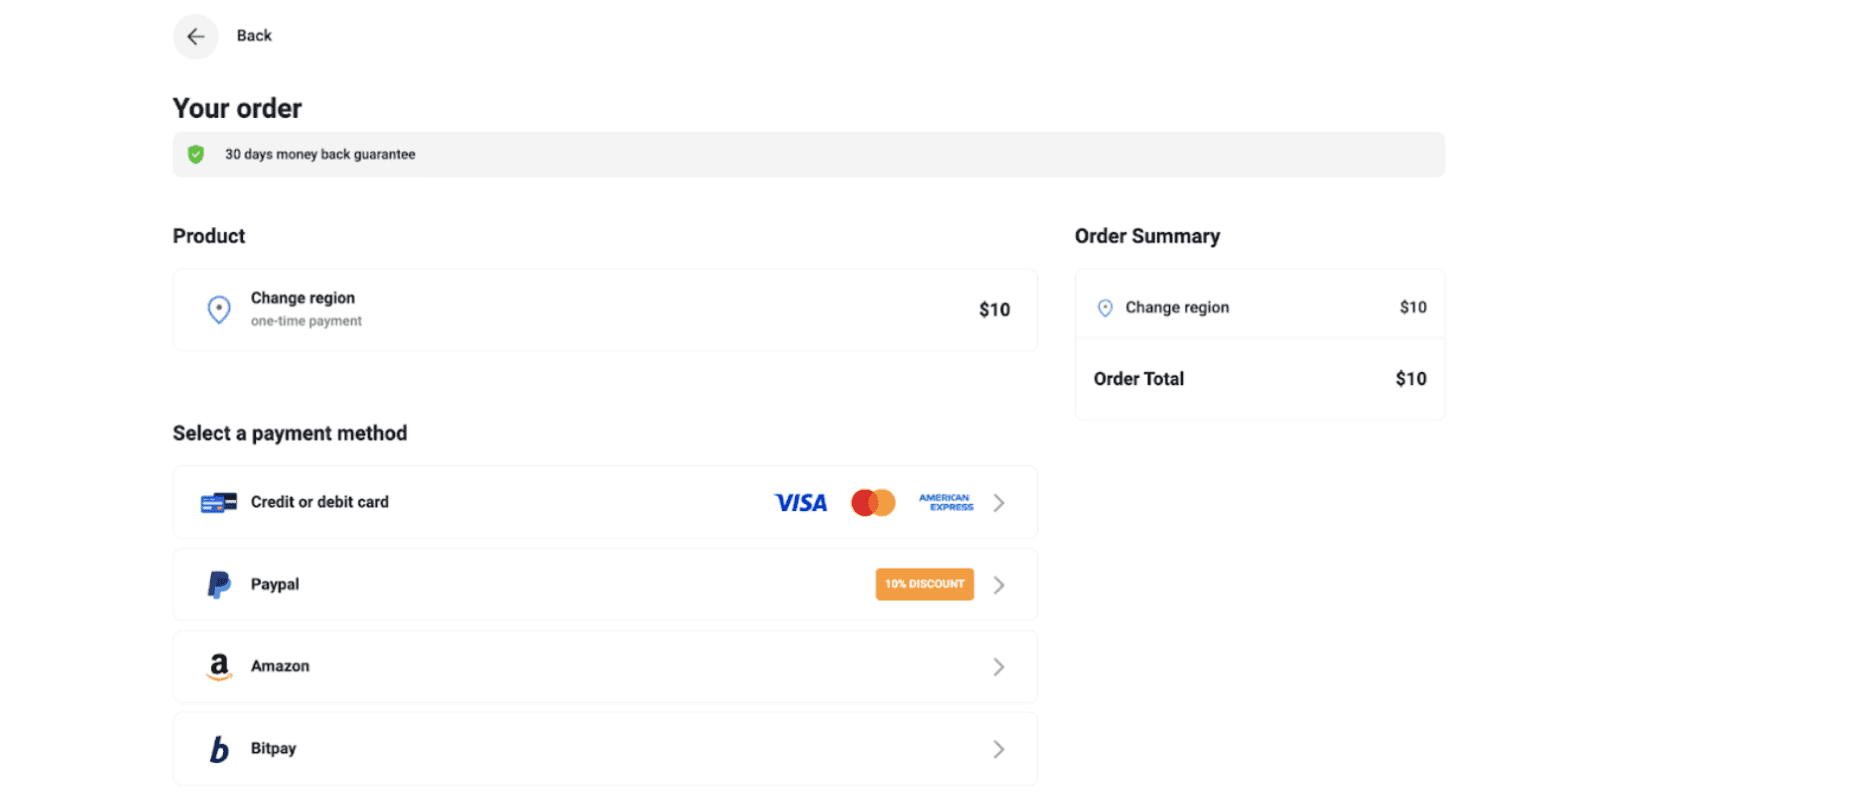
- At this stage, you will see a pop-up message indicating the number of days remaining to the free change option (available once in 30 days) and suggesting to change the location right now for only $10.
Therefore, you might use any of two options:
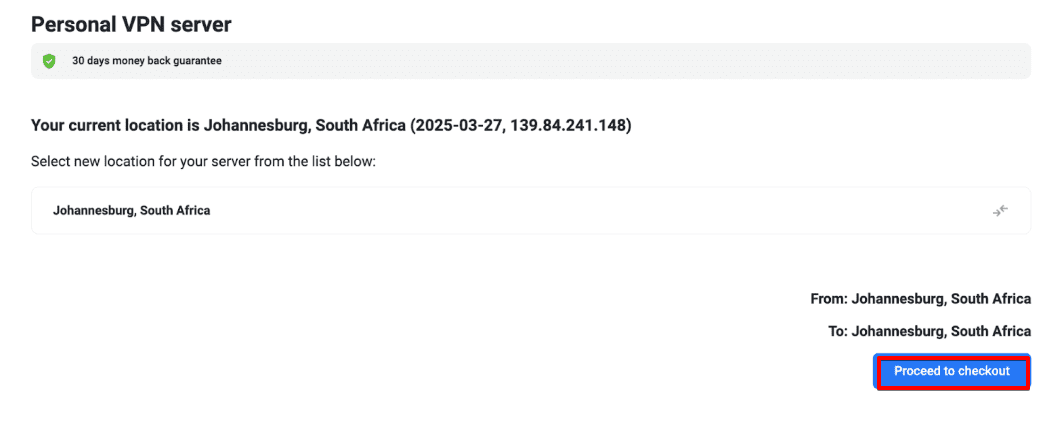
- Press Change, select the desired location, click Proceed to checkout, and complete the payment via any available method.
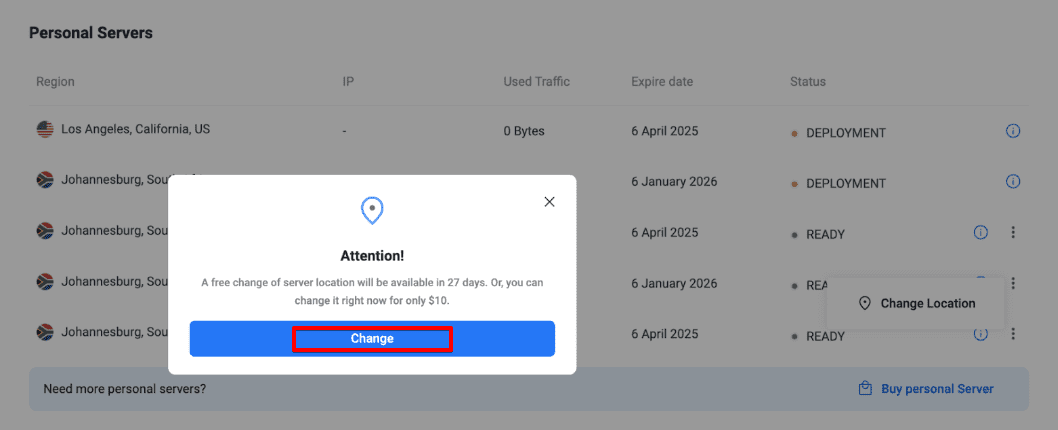
- If the free change is available, just select the desired location, and press Confirm.
How to prolong my Personal Server or Personal IP?
In case you have canceled the auto renewal option and want to extend your subscription manually, please follow the next steps:
- Log in to your User Office.
- Find the VPN Unlimited product, and click Manage.
- Press the Prolong button next to the appropriate Personal Server or Personal IP.
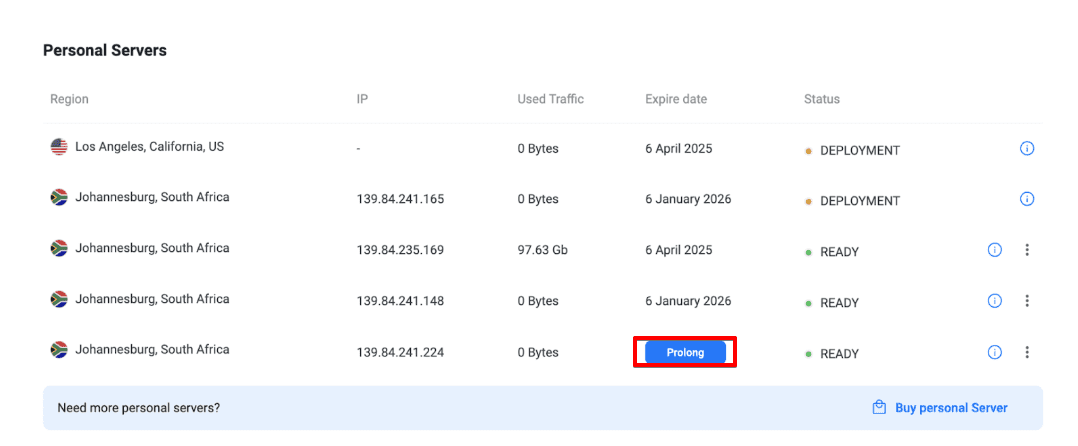
- Select the desired subscription.
- Perform payment via any available method.
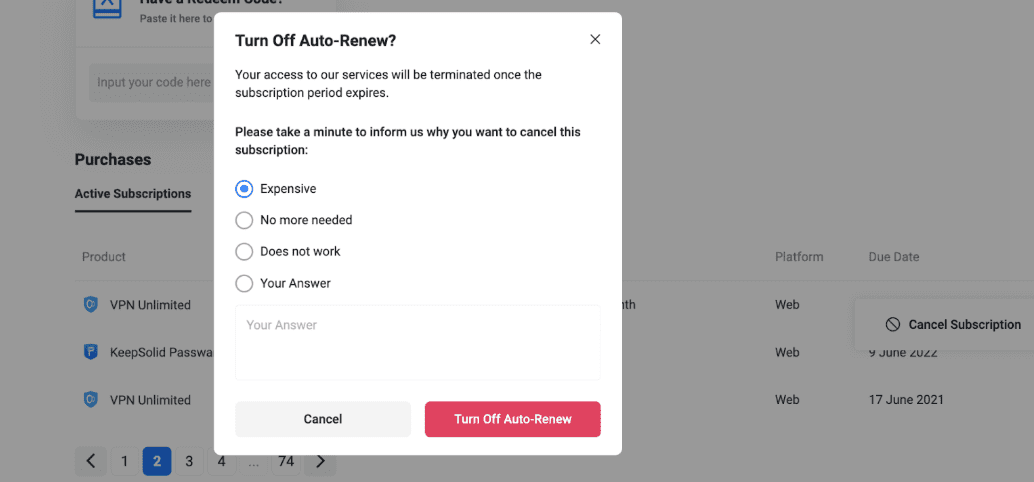
How to cancel automatic renewal of my subscription?
To turn off the auto-renew option, please follow these steps:
- Log in to your User Office.
- Go to the Payments section from the left-hand menu.
- Open the Active Subscriptions tab.
- Locate the appropriate subscription and click the menu icon next to it.
- Select the option to Turn Off Auto-Renew. A pop-up dialog will appear.
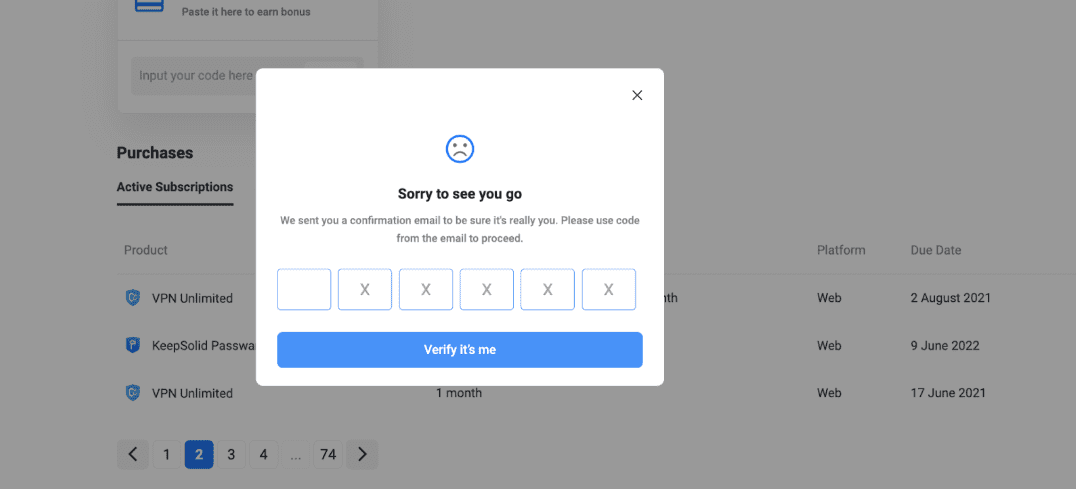
- Choose a reason for cancellation and click Turn Off.
- You will receive an email with a confirmation code.
- Enter the confirmation code into the dialog box to finalize the cancellation process.
Once confirmed, the automatic renewal for your subscription will be canceled.
How to redeem a code?
- Log in to the User Office.
- Go to the Payments section from the left-hand menu.
- In the Have a Redeem Code? section, paste your code into the input field.
- Click the Apply button.
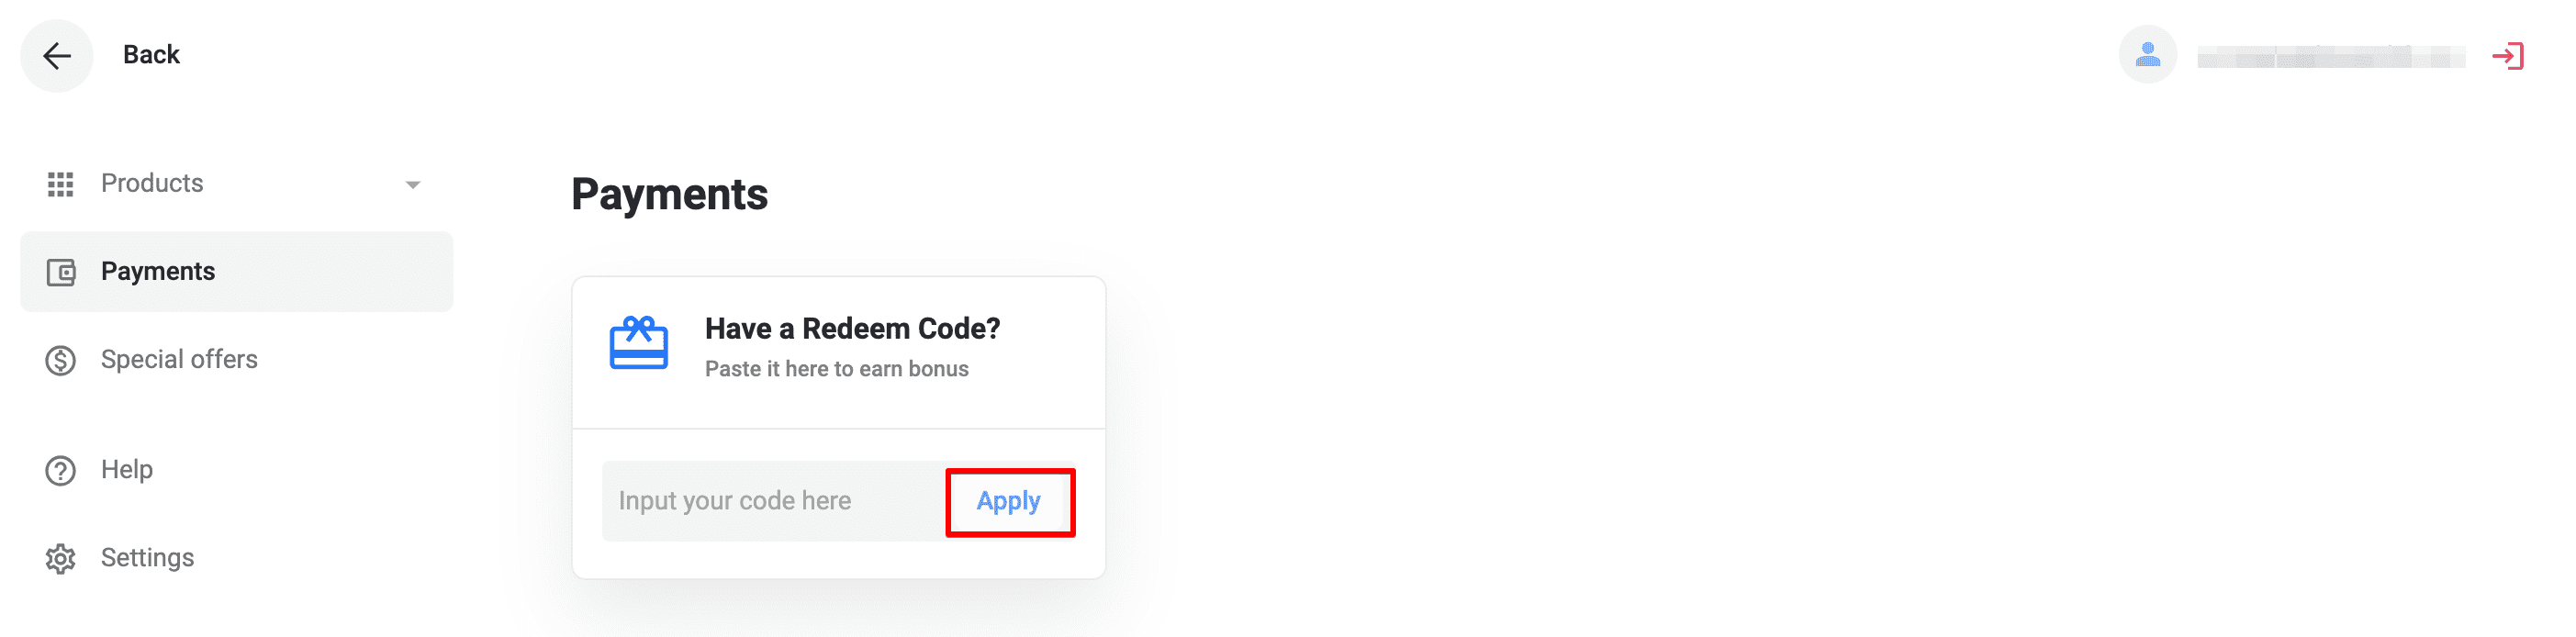
That's it! The code has been activated, and the corresponding subscription has been credited to your account.
How to unsubscribe from the newsletter?
Newsletter is an integral part of our service. However, you can unsubscribe from receiving marketing and promotional materials at any time.
1. Log in to your User Office.
2. Click Settings in the sidebar on the left.
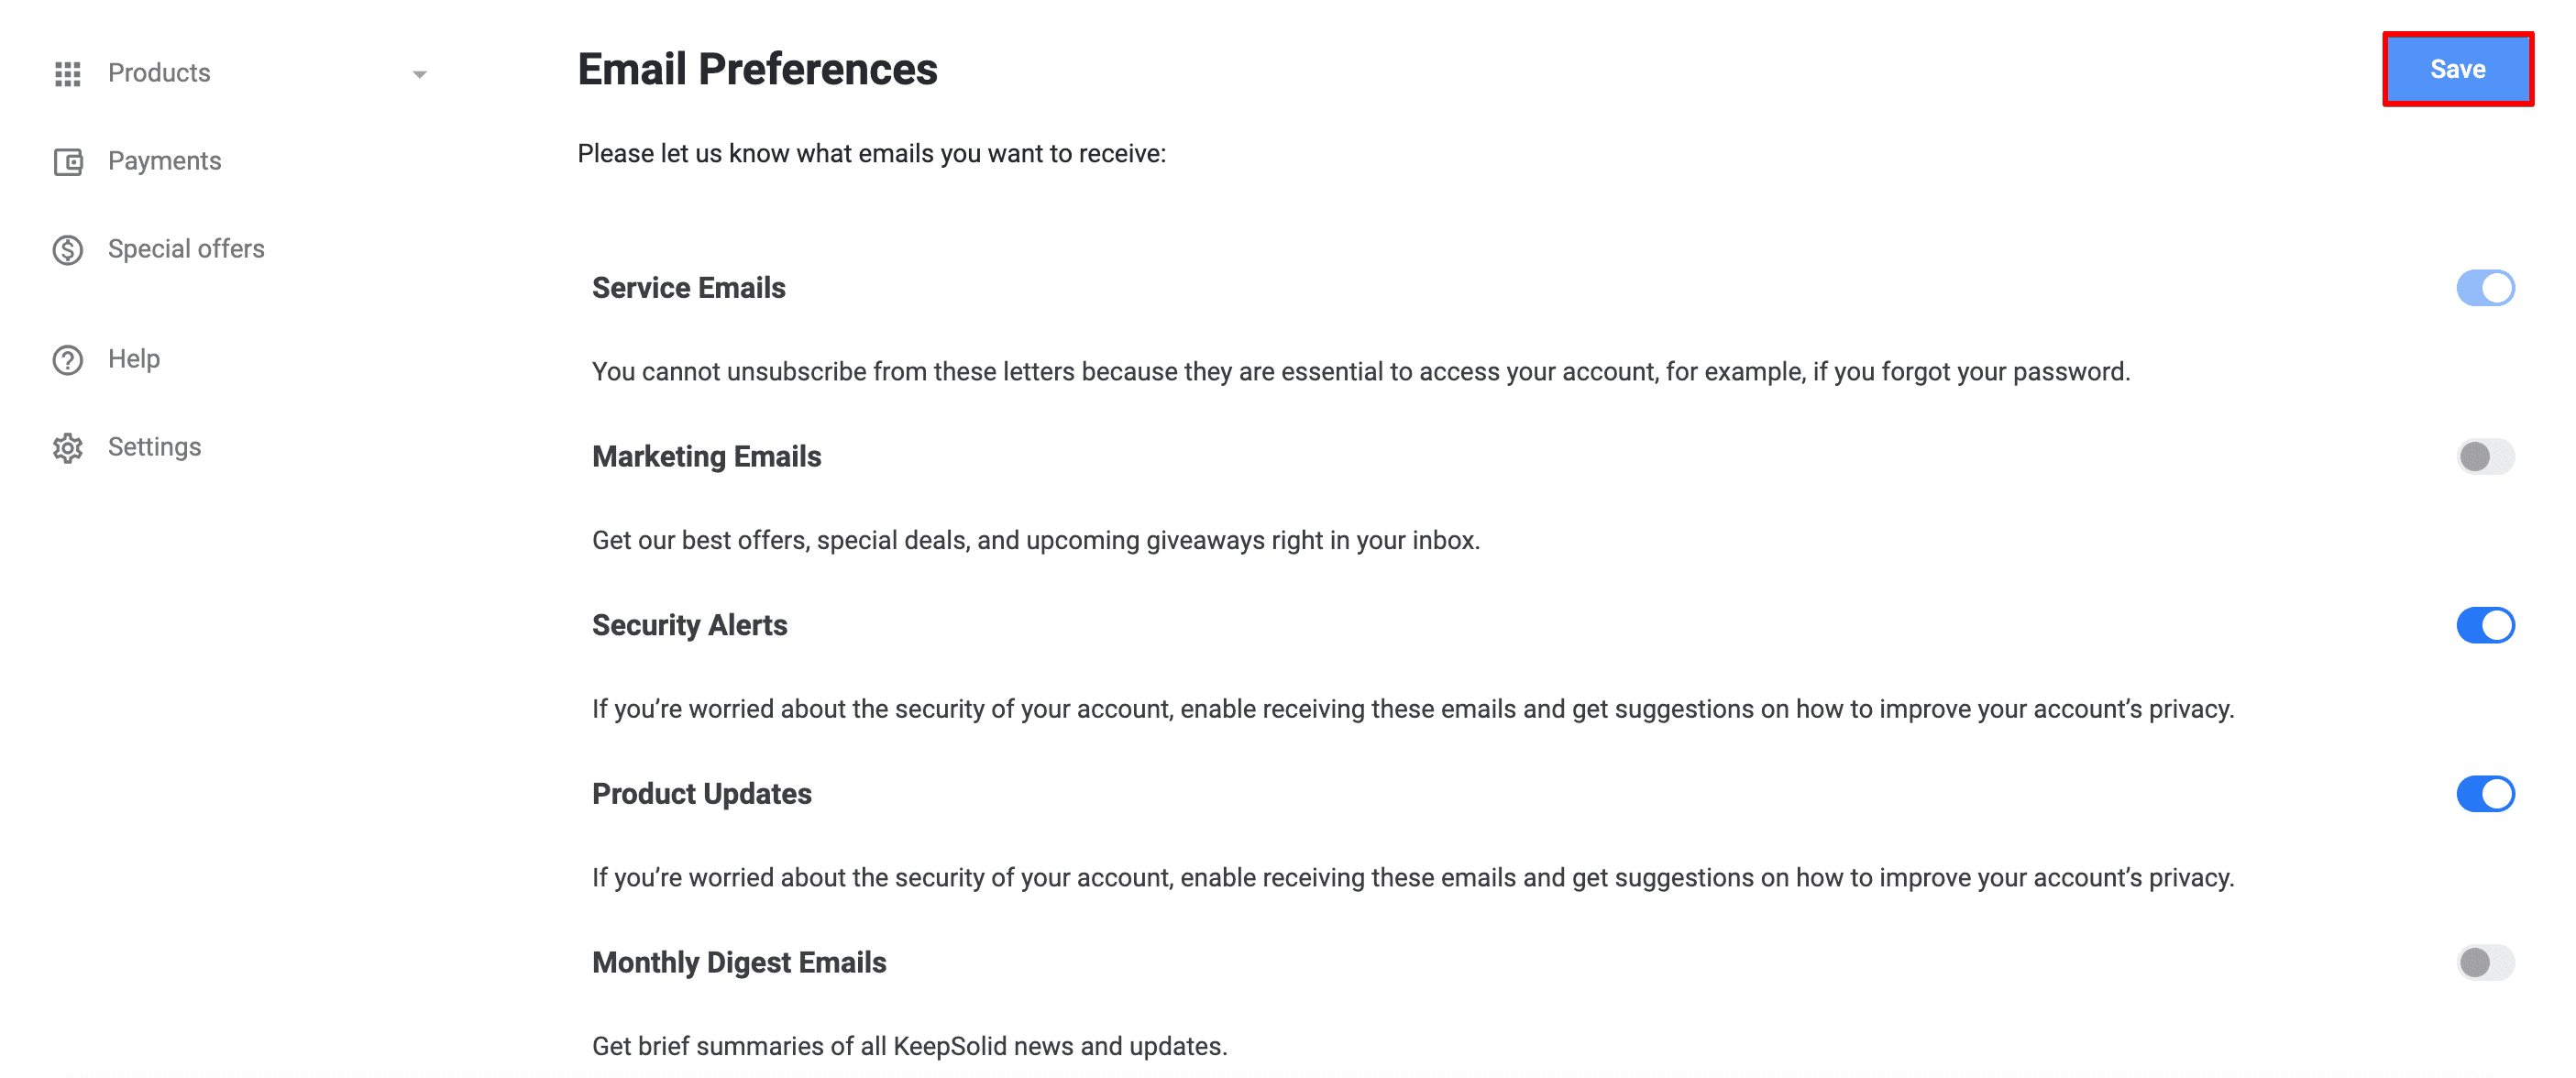
3. Scroll down to the Email Preferences section, and choose the desired options.
4. There you can choose what emails you want to receive:
- Service emails
- Marketing emails
- Security alerts
- Product updates
- Monthly Digest Emails.
5. After you finish, click Save.
Please keep in mind, that irregardless of the chosen option you will still be getting service emails, such as payment details and so on.
If you do not want to receive any emails at all, you need to delete your account. Please refer to the relevant section of this manual for the instructions.
How to export my data?
- Log in to your User Office.
- Navigate to the Settings section from the left-hand menu.
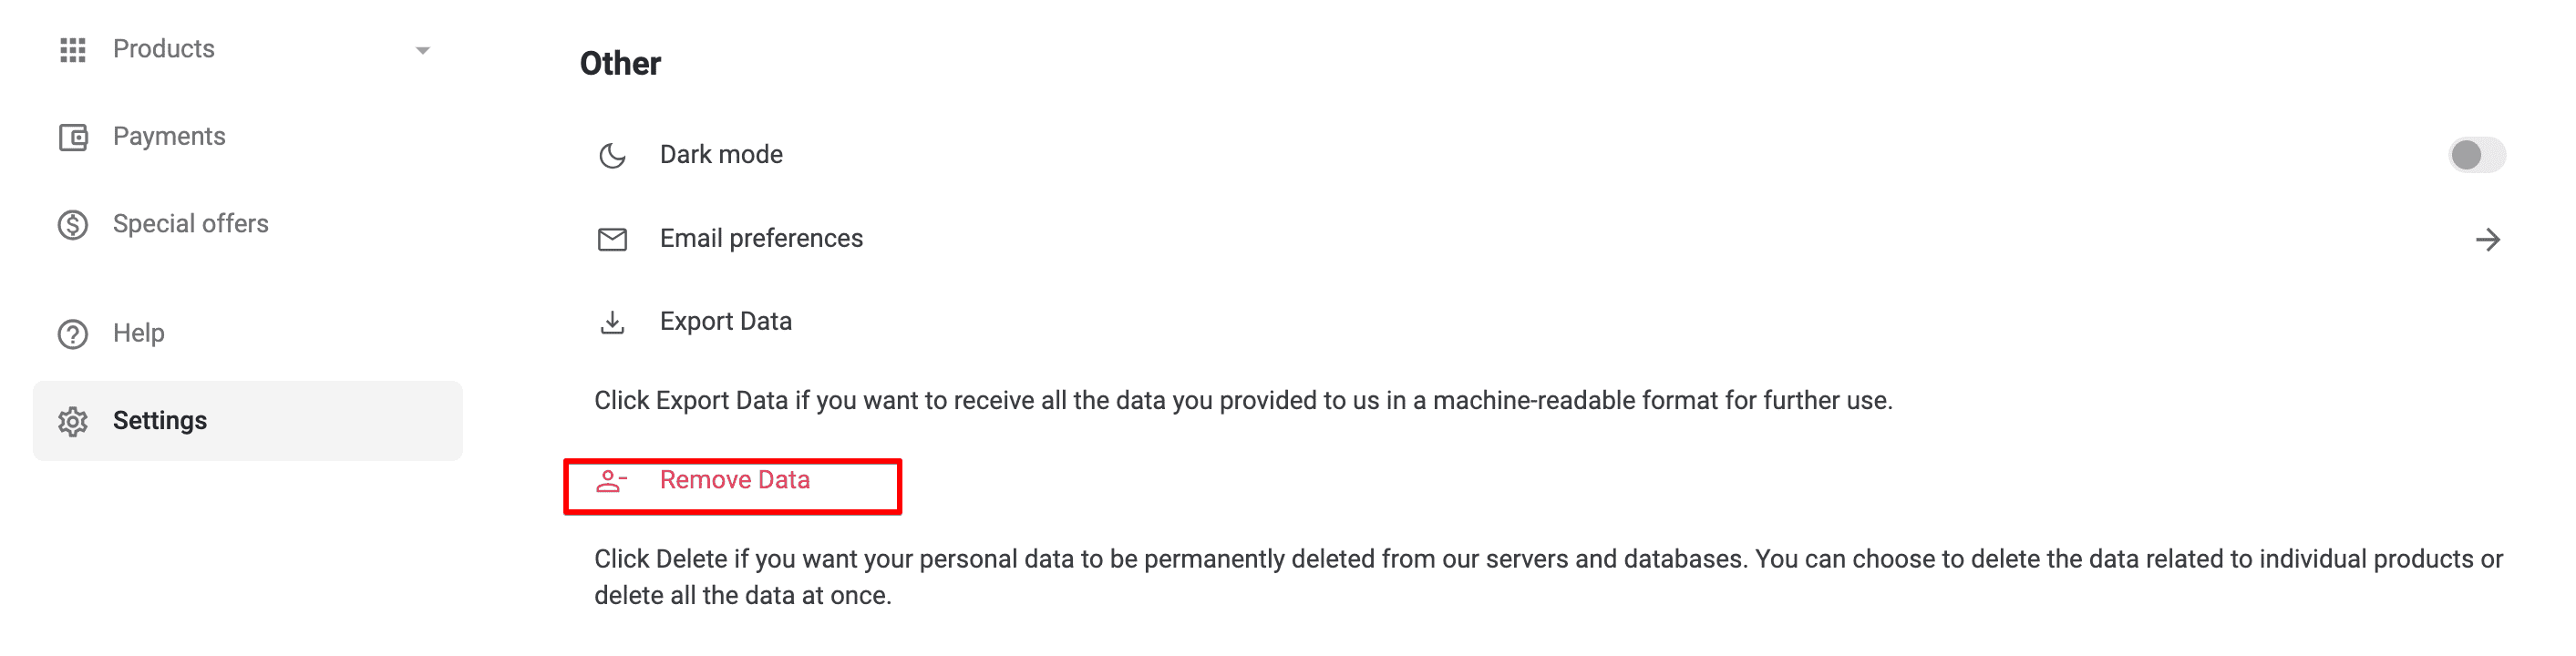
- Scroll down to the Other section.
- Click on Export Data.
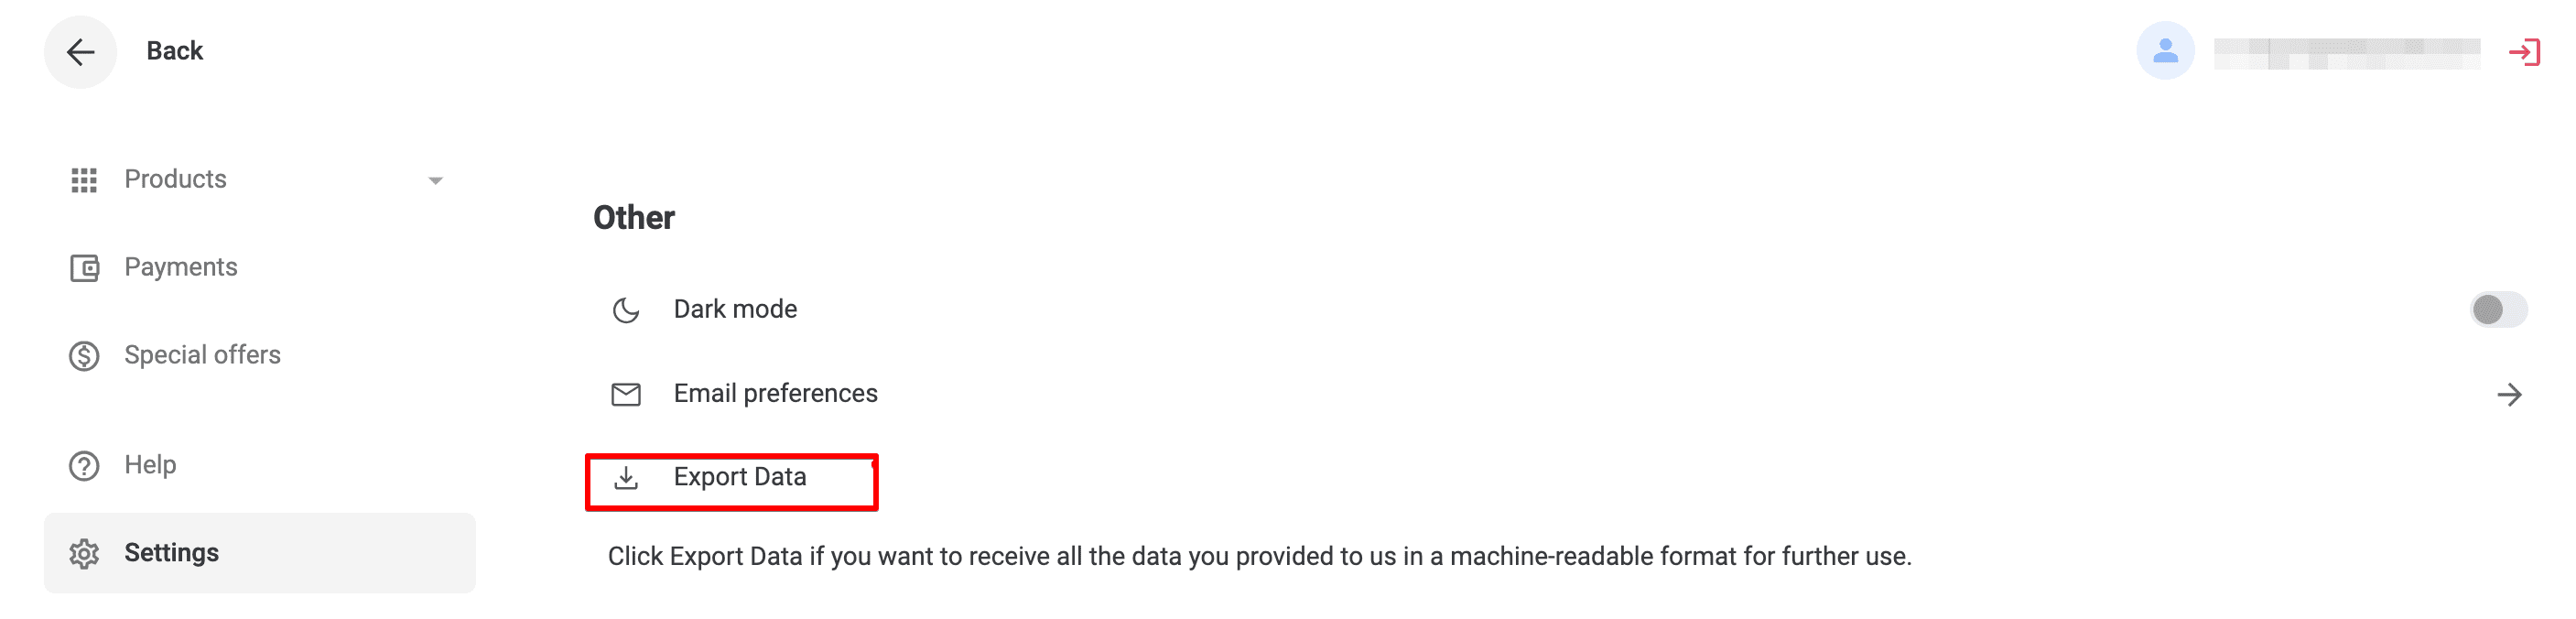
Once your request is processed, you will receive an email with the links to the data exported. They will include the data of your KeepSolid account and all the KeepSolid services you've used.
How to delete my personal data and my account?
- Log in to your User Office.
- Navigate to the Settings section from the left-hand menu.
- Scroll down to the Other section and click Remove Data.
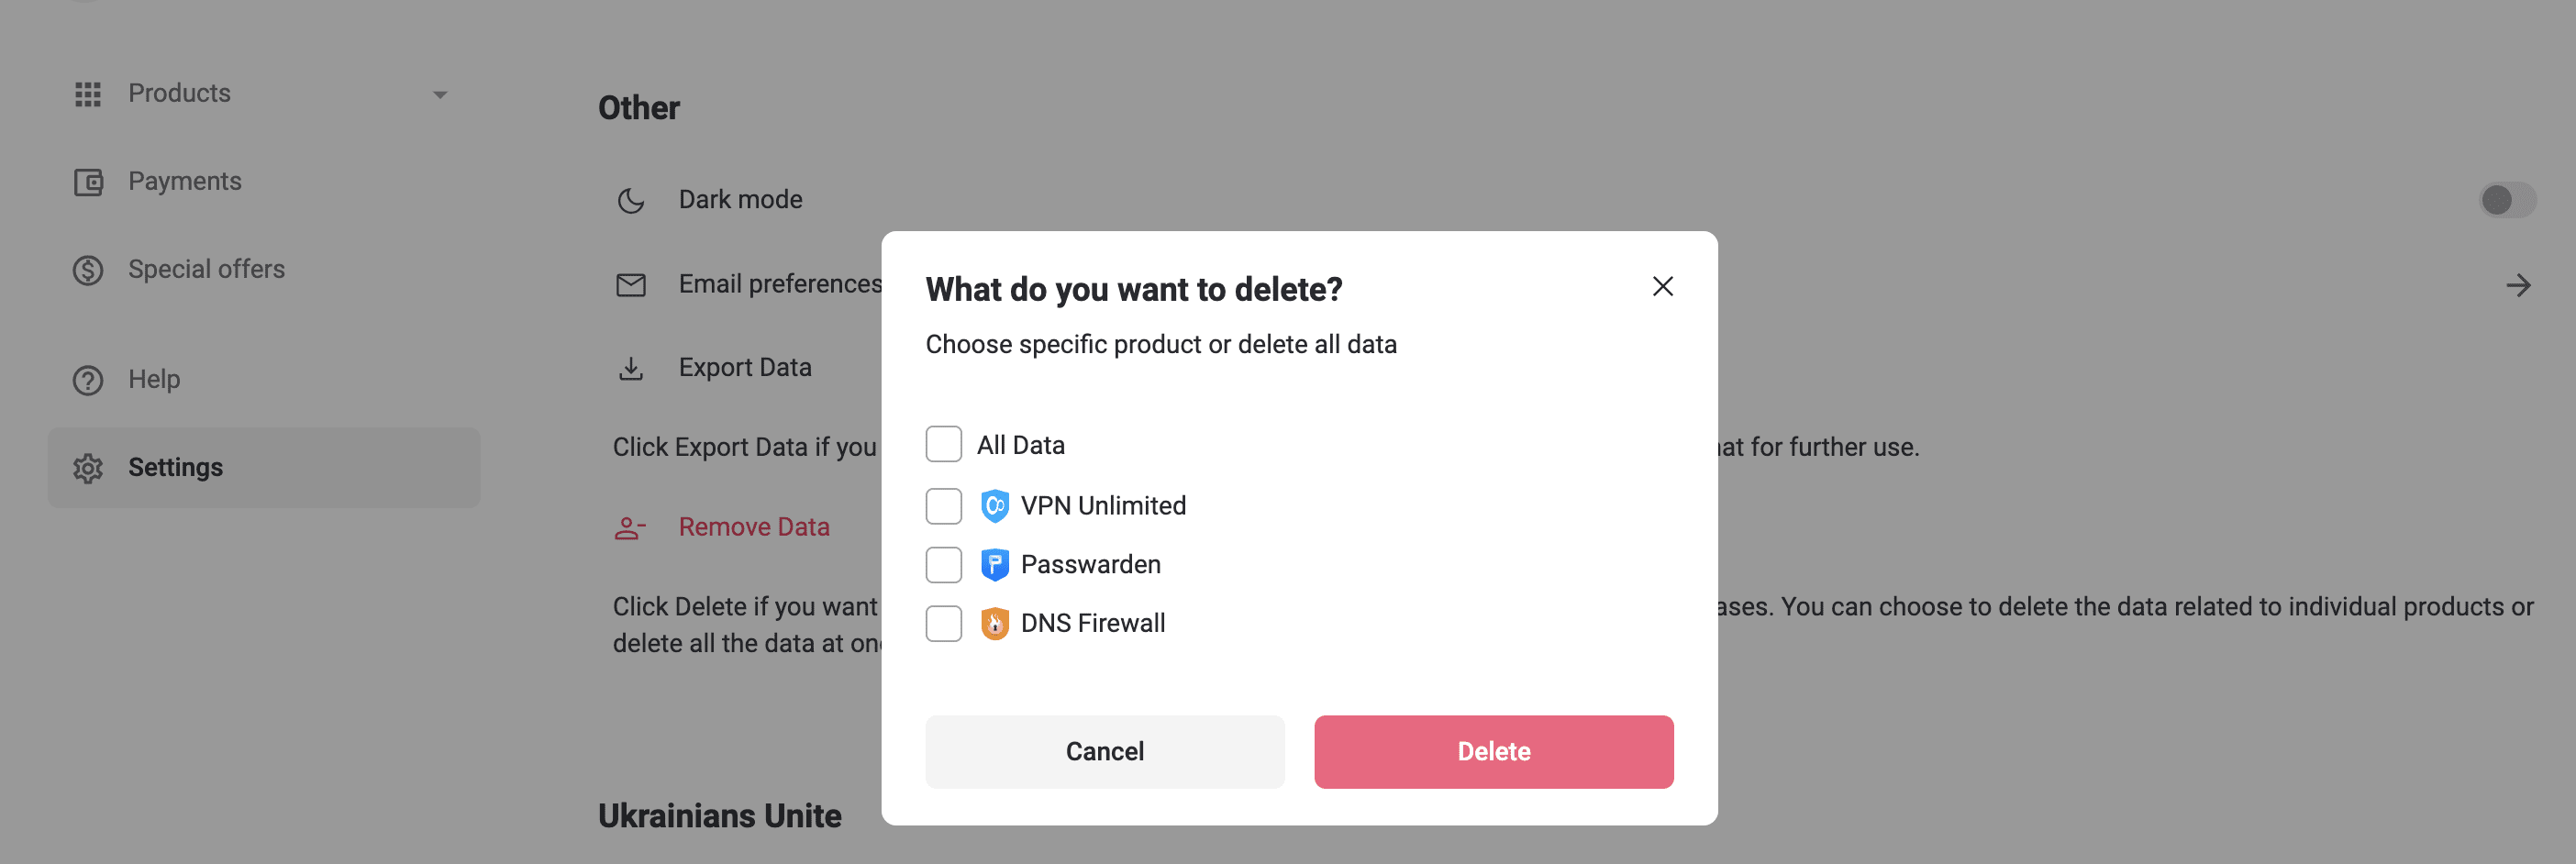
In the pop-up window, you will see two options:
- To delete data for specific services: Select the services you want to remove (e.g., VPN Unlimited, Passwarden, DNS Firewall) and click Delete.
- To delete your entire KeepSolid account and all associated data: Choose All Data and click Delete.
Confirm your choice:
- After selecting the option, you will receive an email with a confirmation code.
- Enter the confirmation code into the dialog box to verify your request. Once the code is entered and verified, the deletion will be performed.
Note: All your purchases (if you have any) will become non-refundable after the data deletion. Also, in case you manage any teams, all connected accounts will be deleted as well.
How to enable two-factor authentication?
Two-factor authentication helps you to make your VPN Unlimited account even more protected by adding a second way to authenticate your identity aside from your password.
- Log in to your User Office.
- Navigate to the Settings section from the left-hand menu.
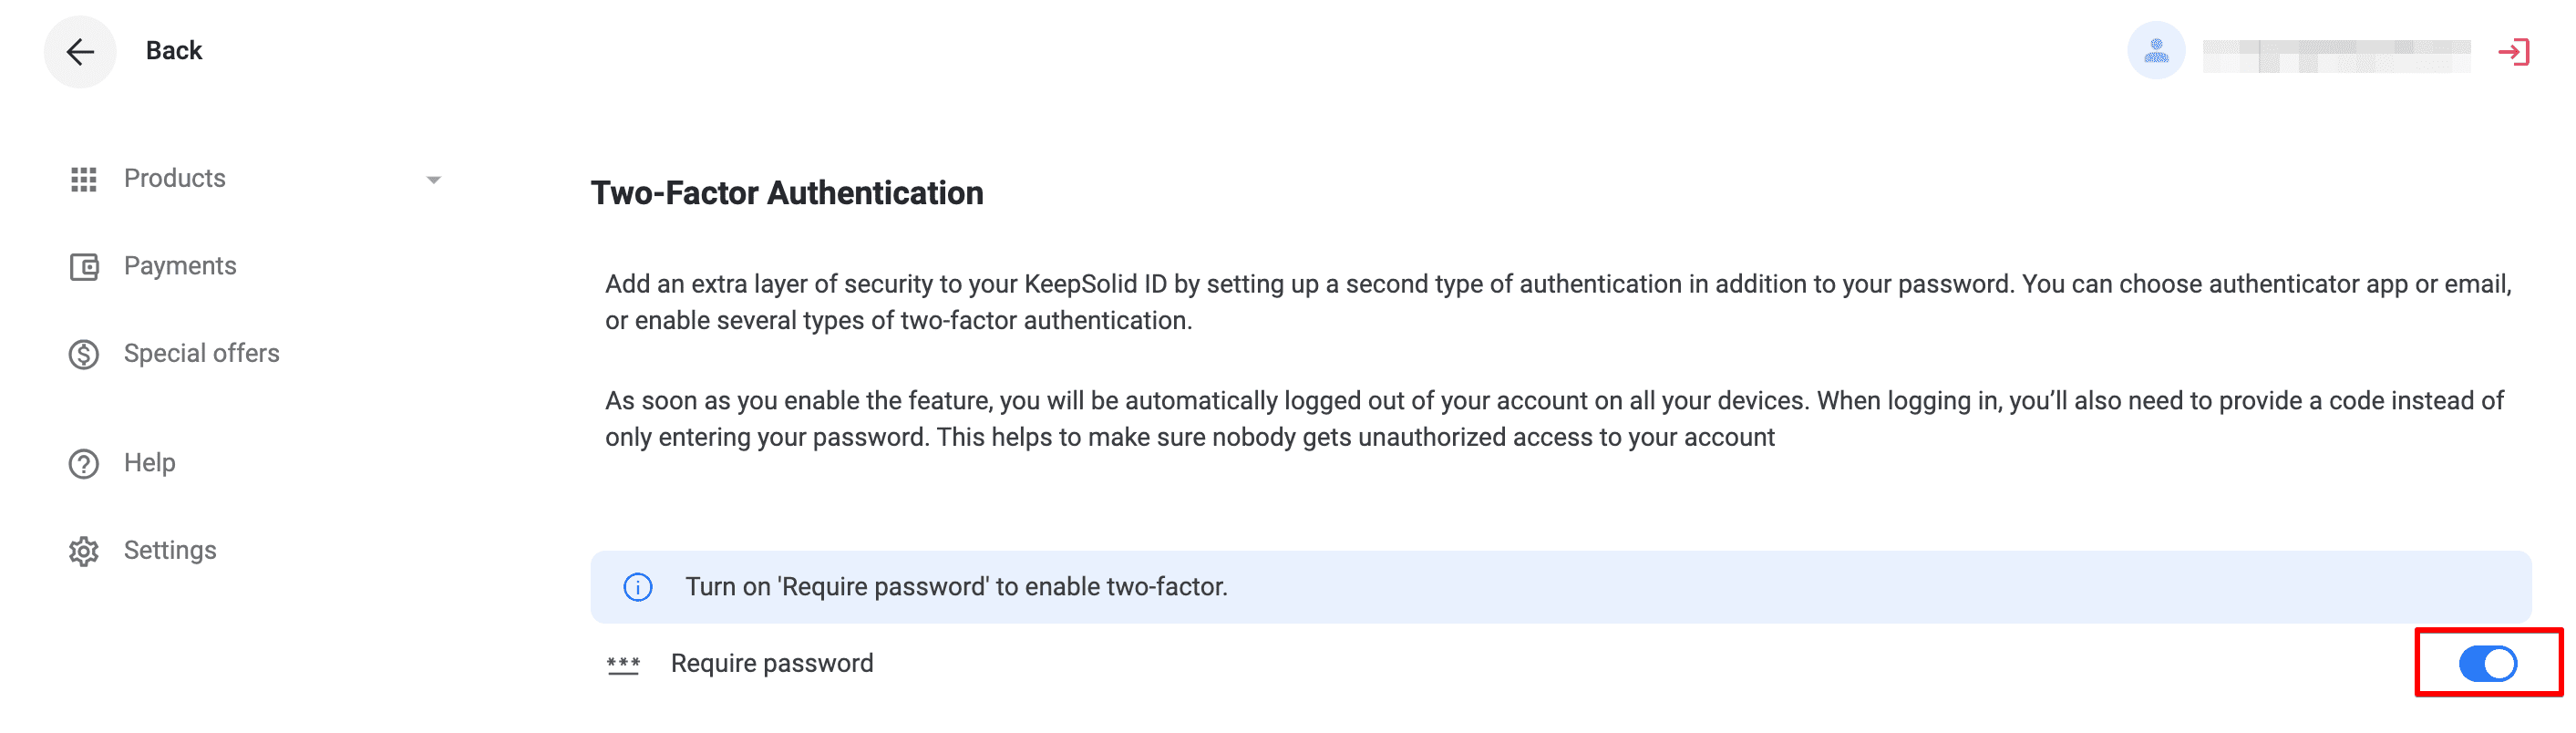
- Go to the Security Settings section.
- To enable 2FA, toggle the Require Password option to enable 2FA. By default, 2FA with a code by email code will be activated automatically.
Enabling Additional 2FA Options
Authenticator App
To add another layer of security using an authenticator app:
- Enable the Authenticator App option in the Two-Factor Authentication section.
- Verify your account by entering the 8-digit code sent to your email.
- A QR code will appear on your screen.
- Download and install an authenticator app (e.g., Google Authenticator) on your mobile device.
- Open the authenticator app and scan the QR code displayed on your screen.
- The app will generate a six-digit authentication code. Enter this code in the verification window and click Confirm.
Once set up, you will need to use the six-digit code from the authenticator app each time you log in from a new device.
Tip: Download and securely store your backup codes. These can be used to log in if you lose access to your 2FA credentials.
Code by Email
To use email as your 2FA method:
- Enable the Code by Email option in the Two-Factor Authentication section.
- Enter the authentication code sent to your email and click Verify.
Note: Some KeepSolid apps may not support 2FA (e.g., certain older versions). For users logging in with social accounts: Create a KeepSolid ID password before enabling 2FA.

If 2FA is Already Enabled:
Use the following combinations to log in, depending on your second factor:
Authenticator App: Your KeepSolid ID password + &ga + the authenticator app code.
Code by Email: Your KeepSolid ID password + &em + the code sent to your email.
Backup Code: Your KeepSolid ID password + &bc + one of the backup codes.
As the process of managing two-factor authentication is quite a complicated one, we've created a comprehensive instruction on how to enable and use two-factor authentication in your User Office. Check out this guide and experience even more security!
We hope that this manual was helpful and showed you how flexible your account management possibilities are!
If there are any questions left, feel free to contact our Customer Support via [email protected].
Get VPN Unlimited right now!
VPN Unlimited is a cross-platform security solution. It means that you can protect all your devices: iPhone, Android smartphone Mac, Windows laptop or PC, and much more.